Sliding door systems firmly consolidated their position in the design of premises. Their functions combine several advantages at once - convenience, efficiency and originality. The installation of such doors is significantly different from the installation of the usual swing models. You can get acquainted with the principles and features of the installation of sliding systems by reading the section - DIY installation of sliding interior doors: assembly video for non-professionals.

DIY installation of a single-leaf sliding door
Content
Types of sliding doors and their equipment
Designers do not skimp on ideas, developing all new models of sliding interior systems. They can vary in the following ways:
- the material of the canvases (they can be made of wood, MDF, glass, plastic, metal or combined from these materials);
- the number of door leaves (one door leaf, multiple leaf system);
- by the way of movement (the roller mechanism moves along the upper and lower guides, the roller is only on top, the canvas moves along a track made of a metal pipe);
- the direction of movement of the door (in one direction, in opposite directions, telescopic, cylindrical);
- the place where the guides are attached (on the floor and wall, on the floor and ceiling, only on the wall).

Double-leaf sliding doors made of translucent glass between kitchen and living room
Sliding doors, the upper rail of which is attached to the ceiling, visually increase the height of the room. Structures that do not use the bottom rail will maintain the uniformity of the flooring of the entire room.

In the open position, the sliding door leaf is located in a niche inside the wall
When purchasing sliding interroom systems for DIY installation, make sure that there is a standard configuration. It includes:
- door leaf;
- pseudo box for framing the opening;
- set platbands;
- decorative plate;
- roller mechanism;
- guide rails;
- guide nut (flag);
- a set of hardware (bolts, screws) and plugs for them.

Double-leaf sliding doors with double row of top rails
The model of roller mechanisms and their number depends on the weight of the door leaf. If you purchase a door without a set of fittings, ask what its weight is.
Related article:
|

DIY tools for installing sliding doors
To install sliding interior doors with your own hands, there is no need to have a special tool. For do-it-yourself installation, you will need the usual "duty" set:
- pencil, plumb line, level;
- roulette;
- set of screwdrivers;
- screwdriverpunch or drill;
- a hammer.

White wooden sliding doors with glass inserts
From devices - you can stock up on a number of wooden wedges and a square bar measuring 50 or 40 (mm) for attaching the guides.
Do-it-yourself installation of sliding interior doors: a video lesson for non-professionals
As can be seen from the video, a layman can also install a sliding interior door with his own hands. Once the desired door design has been selected and the appropriate accessories purchased, installation can begin.

Sliding doors as an element of space zoning in the interior
The most popular do-it-yourself models are sliding single-leaf interior doors. The assembly and fastening of such doors is relatively simple, and at the same time, they have common installation features with other types of sliding doors:
- when installing doors, it is necessary to take into account that the door should be about 5-7 (cm) wider than the opening, otherwise the cracks will gap. If the door moves along the wall, it must be of such a width that it fully accepts the retracted canvas;

Step 1: taking measurements of the doorway
- sliding doors running along the wall or the partition on the upper rail, assemble and install when the floor covering is laid. An accurate measurement of the opening is made, using a level, the horizontal and vertical of the wall are checked, especially in the place where the guide rail is attached. It is very important that the walls and floor, in the places where the guides are attached, are even. Otherwise, it will affect the operation of the sliding mechanism and the door structure as a whole;

Step 2: assembling the door structure and pseudo box
Helpful advice! When deciding to set the model of the door moving along the wall, plan the arrangement of furniture and accessories so that they are not in the path of the door.

Schematic representation of the movement of the compartment door along the wall
- to frame the opening with your own hands with a decorative pseudo-box - insert it along the perimeter of the opening, check the position of the racks with a level. If all posts are vertically aligned, carefully block them with wedges to avoid displacement. If gaps remain, they are filled with foam for installation and hidden under platband;

Step 3: installing the pseudo box in the opening, aligning it vertically and horizontally
- to fasten the upper rail, draw a line with a pencil above the opening at a height equal to the height of the door plus 7 mm. We apply a bar (50x50 mm) along the line so that it is under it, and fasten it to the wall with bolts. In this case, it is necessary to strictly monitor the horizontal position of the bar. The beginning of the bar should coincide with the beginning of the opening, where the door will be located when closed. In the guide, we drill holes for fasteners with a pitch of 20 cm and through them we attach it to the lower surface of the timber, retreating from the wall 6 or 7 (mm);

Step 4: attaching the top rail
- for assembling a sliding mechanism for interior doors with our own hands - we connect the rollers with the carriages, put them into the guide and check their movement. We install stopper plugs at the ends. We fasten the brackets to the upper end of the door. First, we outline and drill holes along the brackets, and then we fasten the brackets with the help of self-tapping screws. We hang the door leaf and check if it touches the wall when moving;

Step 5: securing the brackets to the top end of the door leaf
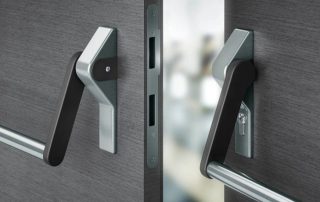
Helpful advice! Don't skimp on accessories! By choosing sliding mechanism for interior doors, make a choice in favor of quality products. It depends on how softly, silently and how long the mechanism will function.

Step 6: install the roller carriages in the top rail
- a flag is traditionally used as the bottom guide. For such an element, a groove is selected at the bottom of the door. It is cut with a cutter, and not everyone has this tool at hand. An alternative is the guide sill (included in the hardware kit), but it is a visible element;

Step 7: adjust the position of the roller carriages
- we move the doors to the full open position and mark on the floor the place for installing the sill, which functionally replaces the flag. We fix it to the floor. By means of the adjusting bolts of the carriages (tightening or releasing them) and checking with a level, we bring the doors to an exclusively vertical position;

Step 8: attaching the bottom guide pad
- it remains with the help of a decorative strip to hide the beam with a guide rail, attach the platbands and plugs at the attachment points.
Additional information and a video of installing sliding interior doors with your own hands can be found on the Internet.
Sliding systems with a sliding door inside the wall. DIY installation specifics
For interior sliding systems, the doors of which are "hidden" in the wall, the installation technology is somewhat different. This does not apply to the basic principles of assembly and fastening of the sliding mechanism, but rather to calculations and preparatory work for the installation of a false wall. The door will roll back into the niche of this wall or a cassette will be installed (if you purchased a door with a cassette unit):
- preparation for do-it-yourself installation of cassette doors begins at the stage of rough construction work. The main feature is that the beam, on which the guide rail is attached, is mounted before the construction of the plasterboard false walls. The width and depth of the niche depends on the dimensions of the cassette or is calculated based on the size of the opening. This takes into account the width at which the canvas can move freely in the niche;

Step 1: arranging the frame for the double wall partition
- if the door is not equipped with a cassette, the bar to which the guide rail is attached is mounted on the profile frame of the false wall. It is necessary to correctly calculate at what level the timber will be attached. At the same time, take into account the height of the future floor covering, the canvas itself and the roller mechanism;

Step 2: making a space inside the wall for the sliding door to move
- due to the fact that the rough work has not yet been completed, the door leaf will not be fastened yet. Instead, the template bar will move along the guide. Its length should correspond to the width of the door. It will be fastened using the same brackets, which will subsequently be installed on the upper end of the interior door. Using a template, we determine the installation location of the stopper-limiter so that the door does not completely hide in the opening. To attach the handle, part of the canvas (7 cm) must remain visible;

Step 3: plasterboard cladding of false walls and finishing
Helpful advice! When determining the location of the stopper on the upper rail inside the cassette, do not forget to take into account the thickness of the decorative casing, which will frame the opening.

Schematic representation of the location of the door leaf inside plasterboard wall partitions
- when the upper guide rail is mounted and the stopper is attached, the niche is completely sewn up with drywall. Installation of the bottom guide sill is carried out when the floor covering is installed.

Step 4: sliding door sliding into the wall
A video of installing sliding interior doors with your own hands shows the technology of the process at all stages.
Installing sliding doors with your own hands (the video confirms this) is a process that does not require professional skills and effort. It is enough to have the necessary minimum of tools and feel free to start the installation yourself. Accurate measurement, following the recommendations - and your room will be transformed by a functional and stylish sliding door.In addition, self-assembly will "balance" the cost of purchasing structures that are more expensive than swing counterparts.