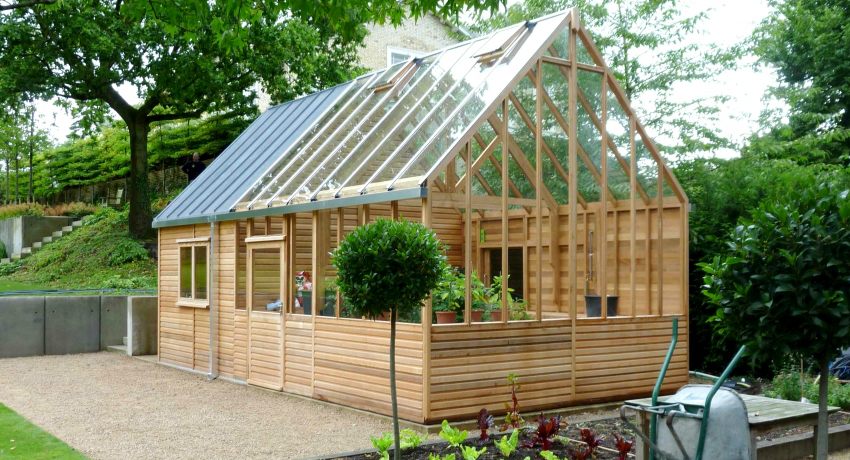
Today, polycarbonate is the most popular material for the construction of greenhouses and greenhouses. With its help, they make both small structures that are great for installation in small areas, and greenhouses of impressive size. This material owes such popularity to a number of characteristics and positive qualities. Consider how to make a polycarbonate greenhouse with your own hands and what to look for during the installation process.

A reliable stationary polycarbonate greenhouse is an excellent solution for a summer cottage
Content
- 1 DIY polycarbonate greenhouse: the advantages of using the material
- 2 Disadvantages of using polycarbonate for the construction of greenhouses and greenhouses
- 3 How to make a greenhouse correctly: do you need a foundation and how to choose it correctly
- 4 DIY greenhouse frame materials: photos of the best examples
- 5 DIY polycarbonate greenhouses: drawings and description of the best models
- 6 How to build a polycarbonate greenhouse with your own hands: features of working with material
- 7 Polycarbonate greenhouse maintenance rules
- 8 DIY polycarbonate greenhouses
- 9 The most popular options for mini greenhouses for giving with your own hands
- 10 Recessed mini greenhouse made of polycarbonate
- 11 How to make a mini greenhouse with your own hands: a mobile structure
- 12 What you can use homemade greenhouses for
- 13 How to assemble a polycarbonate greenhouse: video assembly instructions
DIY polycarbonate greenhouse: the advantages of using the material
The polycarbonate greenhouse technology has many advantages over other materials that have been used for this purpose over the years. For example, the positive aspects of such a choice include:
- polycarbonate has high strength. If you compare it with plastic wrap or glass, then it is several times stronger and much easier to tolerate any external influences. This is very convenient if during the cold season it is not planned to dismantle the greenhouse, and it will have to face a serious load associated with precipitation. Glass in such conditions often cracks, and the film does not at all withstand the pressure of the snow cover;

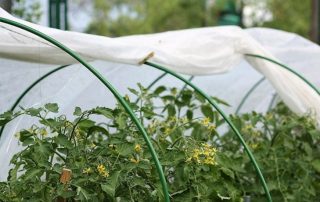
Polycarbonate perfectly transmits sunlight, thanks to which vegetable crops develop and ripen faster
- the presence of a protective layer against ultraviolet radiation allows for optimal plant protection. For example, ordinary glass does not have such a layer, which leads to the harmful effects of sunlight and often causes the death of young plants;
- polycarbonate is a two-layer material, which significantly increases its thermal insulation capabilities. Thanks to this, the plants remain warm even at rather low ambient temperatures;
- this material is not sensitive to temperature extremes and can easily tolerate serious drops from -50 ° C to + 60 ° C;
- working with polycarbonate is easy and convenient. Being lightweight, the material bends well. There are no problems with drilling, so it is quite possible to use it as a covering material for any, even very intricate structures;
- the material is sold in sheets of various sizes. Having chosen the necessary parameters, you can cover the greenhouse with just a few sheets or, if necessary, easily cut them into pieces;
- the light transmittance of polycarbonate is also noteworthy. On the one hand, it perfectly transmits sunlight, providing plants with the required amount. But at the same time, he has the ability to scatter it, which does not allow the leaves to burn, even when under the direct influence of rays;
- of course, one cannot but mention the cost of polycarbonate. Even the highest quality material will cost significantly less than glass, which would be required to build a greenhouse.

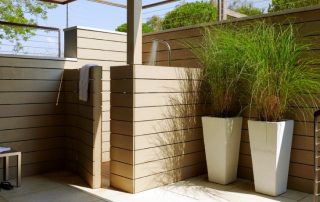
Compact mobile polycarbonate greenhouses are convenient for use in small summer cottages
Disadvantages of using polycarbonate for the construction of greenhouses and greenhouses
Of course, polycarbonate, like other materials, has its own characteristics and disadvantages that have to be reckoned with. How large they are can be judged by considering each of them:
- the service life of polycarbonate directly depends on its quality, as well as operating conditions. One of the most common problems that one has to deal with is material burnout in the sun. Due to constant exposure to sunlight, the strength of the covering material may decrease;
- the quality of polycarbonate is another pitfall. There is always a risk of purchasing products from an unscrupulous manufacturer;
- during the operation of a polycarbonate greenhouse, there are some difficulties associated with the installation of a heating system. Of course, there is always a solution, but you have to take care that the material does not melt.
Helpful advice!The approximate weight of a standard size polycarbonate sheet is 10 kg. It is highly recommended to carry out weighing before buying, and if the weight is noticeably less, refuse to purchase the material from this manufacturer. Otherwise, you run the risk of facing many difficulties associated with the low quality of the covering material.

With correct calculations, the greenhouse design can include not only vents, but also shelves for small plants
How to make a greenhouse correctly: do you need a foundation and how to choose it correctly
Unlike larger greenhouse designs, greenhouses do not always require a foundation. It is often seen that the frame is attached directly to metal pins driven into the ground. This option is acceptable, but only for very small and light greenhouses. Among the risks that one has to face in the absence of a foundation is deformation of the frame under its own weight, damage caused by strong gusts of wind.
For this reason, before proceeding with the assembly of the frame, it is highly recommended to prepare one of the foundation options:
- tape;
- brick;
- foundation on screw piles;
- timber foundation.

When using a bar for building a greenhouse, the tree must be treated with hot drying oil
The first three options are suitable for static structures that do not plan to disassemble for the winter. But the timber foundation is an ideal solution for installing a seasonal greenhouse. Preparation of such a foundation will take only a few hours.
Another important aspect that must be taken into account before starting the installation of the foundation is the depth of the groundwater on the site selected for construction. If the waters are deep, it is better to give preference to a reliable tape or brick base. If the groundwater is close to the surface, the strip foundation will not work due to the risks of deformation and destruction.
If you have to deal with a high level of groundwater at the site, give preference to simpler options - a foundation made of timber or screw piles.
Let's take a closer look at how to independently implement each of the proposed options, as well as the features and nuances of each solution.

For small polycarbonate greenhouses, there is no need to make a concrete or brick foundation, for this purpose you can use wooden boards
How to properly install a greenhouse on a brick foundation
If they want to provide a reliable and durable base for their greenhouse, owners often choose to build a brick foundation. Its service life, as well as resistance to the influence of various factors, is many times greater than the capabilities of the timber. That is why we will consider how to independently make a brick foundation with a tape cement base.
In no case should you underestimate the importance of adhering to all technologies and recommendations in the process of work, because the strength of the foundation directly depends on how well each stage of work is carried out. So, the algorithm of work is as follows:
- You need to start with the markings, which can be done with wooden pegs and a rope.
- Then you need to dig a trench around the entire perimeter of the future greenhouse. Its depth should be 40-60 cm.
- A sandy "pillow" is poured into the bottom of the trench.
- The concrete base is poured.
- A row of bricks is laid on top.
- A layer of roofing material is laid, which will play the role of waterproofing.
- The bottom harness is attached with anchor bolts.

For impressive structures, it is better to use a stone foundation that can support the weight of the greenhouse
Helpful advice! The larger and heavier the greenhouse is planned to be, the more rows of bricks will need to be laid out in the process of laying the foundation.
The foundation for a greenhouse from a bar: installation features
If it is planned to erect a simple and light structure, as an alternative to a complex and massive brick foundation, a timber base can be prepared. This will require a wooden bar 50 × 50 mm in diameter, metal pegs of sufficient length to attach the bar to the ground, and drying oil.
In this case, the main purpose of drying oil is to prevent the process of wood decay and to neutralize all external factors that will affect the material: precipitation, condensation, etc.
Helpful advice!In order to prevent the rapid deterioration of the material, it is better to fasten the base not to the ground, but to brick supports. Also, screw piles can be used for this purpose. Such a strapping from a bar is the best option.

For the construction of a greenhouse from a profile pipe, a foundation made of a processed wooden beam is suitable
DIY greenhouse frame materials: photos of the best examples
Despite the fact that polycarbonate is lightweight, it still needs a high-quality frame, to which the covering material can be securely attached.
The following options are suitable for this purpose:
- wood (wooden beam);
- aluminum guides;
- metal pipes or corners.
It is worth noting that in order to make a greenhouse yourself, as a rule, they use the first option - wood. This material is familiar to everyone, is quite easy to process and, in general, is excellent for this purpose. The disadvantages include only the instability of the material to moisture, as well as difficulties in the event that it is necessary to make a collapsible structure. But this does not stop many, and the timber continues to be actively used.

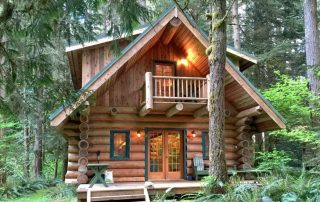
Many summer residents choose wooden beams for building a greenhouse precisely because of the aesthetic appearance of the structure, which will easily fit into any landscape design
How to install a wooden frame on a timber foundation
As for the installation of a wooden frame on a foundation (especially if it is also made of wood), everything is quite simple here. The main thing is to have some experience with an ax and a saw, but otherwise it will be enough to adhere to the instructions.
There are several ways to attach a wooden frame to a timber foundation: complete cutting, partial cutting and fastening with metal corners. The easiest way is the last one. Almost no skills are required here, and even a beginner can cope with it.
But at the same time, the most reliable way is complete felling. This method allows you to ideally fasten two elements together, however, its implementation will require certain skills and abilities, which should become the key to a quality work done.
Helpful advice! In order for the lower fasteners not to loosen until the completion of the assembly of the structure, it is necessary to make slopes that will help relieve the load from the fastening points and fix them in the desired position until the upper strapping is made.

The timber frame should be securely attached to the foundation in order to avoid deformation of the covering material when operating the greenhouse
DIY metal greenhouse made of polycarbonate: photo and installation instructions
Metal is a durable and reliable material that is quite possible to use to create a greenhouse design with your own hands. But it is worth noting that in this case the installation has some peculiarities, and it is worthwhile to think in advance about the way by which the frame will be attached to the base.
Related article:
DIY greenhouses: the best projects and materials for construction
What materials to use for construction. How to choose a place to install a greenhouse. Construction of various types of structures.
The ideal option is to use aluminum guides that are easy to process. Sawing them is easy with a jigsaw designed for metal work, and in order to fix it to a timber strapping, you can use ordinary self-tapping screws. By the way, polycarbonate is also attached to the frame using self-tapping screws.
The only thing worth paying attention to is that all holes must be prepared in advance. Otherwise, there is a risk of deforming the frame, which will lead to displacement of the hole. In this case, you will not be able to mount properly. The same principle holds true if polypropylene pipes are selected as the material for the greenhouse.

Mounting polycarbonate to a metal frame using a split profile
DIY polycarbonate greenhouses: drawings and description of the best models
When it comes to making a polycarbonate greenhouse with your own hands, blueprints are the beginner's best assistant. Having chosen a suitable scheme, you can use the proposed dimensions or recalculate at your discretion. As an example, consider the algorithm for erecting a frame made of plastics pipes, wood and metal, paying attention to the nuances of work.
How to assemble a greenhouse made of polycarbonate and plastic pipes: advantages and disadvantages of materials
The use of plastic pipes for the construction of a greenhouse frame allows you to solve one significant problem that every summer resident has to face. The thing is that polycarbonate structures are quite difficult to dismantle. Therefore, if they want to have a collapsible design, the owners have to go to some tricks, and think in advance how to implement it.

The frame of the greenhouse using plastic pipes is quite light, so if necessary, it can be dismantled and moved to another place
Plastic (polypropylene) pipes are the most suitable option for creating collapsible structures of any shape. With a regular jigsaw, they can be easily cut into pieces of the required size. In addition, the service life of such pipes is quite long due to the fact that condensation does not form inside, which makes it also resistant to weather conditions. This is how they compare favorably with wood. The main thing is to initially decide whether the structure will be collapsible or stationary. In the first case, screws must be used to fasten the elements together, while for stationary greenhouses, the frame is firmly welded.
Among other things, one has to reckon with such a moment as the low weight of the materials. On the one hand, this greatly facilitates installation, but on the other hand, it makes the greenhouse unstable to strong gusts of wind. As a rule, structures made of plastic pipes and polycarbonate are very easily deformed.
Therefore, in order to provide the greenhouse with proper strength and reliability, the following technology is used: stiffeners are made using a wooden beam, 6 or 8 mm thick. For this, the length of the timber must correspond to the length of the future greenhouse. In addition, a base is made of a bar, to which fastening will be carried out in the future.

Polycarbonate greenhouse construction scheme using plastic pipes and concrete slabs
How to build a greenhouse with your own hands: step by step instructions for work
Adhering to the following instructions, you can make an excellent greenhouse from polypropylene pipes:
- A base is constructed from a bar, which is attached to the ground with metal stakes.
- A frame is assembled from plastic pipes, the elements are connected using special crosses designed for this purpose.
- Using self-tapping screws, the polycarbonate is attached to the frame.
Helpful advice! If the screws do not screw into the pipes easily, it will be better to drill the holes in advance.
How to build a polycarbonate greenhouse with your own hands: features of working with material
Covering the frame with polycarbonate has its own characteristics. First of all, this concerns the choice of the frame material, and then the methods of its fastening. Let's consider the main aspects that are worth paying attention to during the construction process.

For reliable fastening of polycarbonate to the frame, special thermal washers are used that do not allow moisture to get inside the material
For the construction of greenhouses, it is customary to use polycarbonate with a thickness of 6 or 8 mm. But for a greenhouse, a thinner material - 4 mm is quite suitable. Of course, if an insulated structure is planned for year-round use, then it is better to give preference to polycarbonate 10 mm thick.
Due to the fact that polycarbonate is a flexible material, it is not difficult to cut and fasten it. However, when buying, you should pay attention to its quality, so that in the future it can easily endure any temperature pressures and does not deteriorate under the influence of sunlight and moisture.
Helpful advice! The ideal temperature for working with polycarbonate is 10-12 ° C. If this figure is exceeded, the material expands. On the contrary, at low temperatures, polycarbonate shrinks.
In the process of arranging the roof, it is highly discouraged to make the surface flat.This will cause water and snow to accumulate on its surface, causing unnecessary stress. Pitched roofs are much more efficient and extend the life of the entire structure.

Cutting scheme for a polycarbonate sheet for a greenhouse 4 × 3 × 2 m
In the process of self-manufacturing greenhouses and greenhouses, polycarbonate is most often attached to the frame using aluminum brackets or plastic earrings. However, manufacturers do not recommend using these methods, emphasizing that this will shorten the life of the material. There are other methods that you can learn about by looking at various materials on the topic of building polycarbonate greenhouses with your own hands: videos, photos, comments.
How to fix polycarbonate to the greenhouse frame using profiles
The main method of fastening, which is recommended by polycarbonate manufacturers, involves the use of profiles for this purpose. This solution allows to ensure tightness of the finished structure, and also guarantees the reliability of fastening better than others. Of course, this is not a very cheap method, and certain financial costs will be required to implement it, but all the connections will be made with high quality.
In order to fix polycarbonate in this way, it is necessary to pre-drill holes for self-tapping screws. This will prevent unnecessary impact on the structure and will not damage it during installation.

To fasten polycarbonate sheets to a metal frame, it is better to use steel corners, which will not allow the structure to loosen and deform
Helpful advice! Particular attention should be paid to the choice of self-tapping screws and thermal washers for fastening. The more area they have, the better, as this will preserve the integrity of the material and prevent condensation.
Polycarbonate greenhouse maintenance rules
In order for the structure you have made to properly serve for more than one year, you must regularly take care of it and follow the simple recommendations for its operation:
- in spring, before using, the walls of the greenhouse must be washed with soapy water and a soft cloth. But the use of hard brushes and alkaline solutions is prohibited;
- polycarbonate joints are often a habitat for insects and mold. To avoid this, it is recommended to use a sealant, sealing all gaps with it. The same can be done in places where cables are laid to provide lighting, heating, etc.;
- in snowy winters, make sure that the snow layer on the roof is not too heavy and heavy. To do this, snow is manually removed from the surface.

Proper care of the greenhouse will allow not only to protect plants from harmful bacteria, but also to extend the life of the structure
Observing these difficult recommendations, you can significantly extend the life of the greenhouse and avoid common malfunctions that owners often have to face when they carelessly handle the structure.
DIY polycarbonate greenhouses
Separately, it is worth considering this type of construction as mini polycarbonate greenhouses. Such an alternative to full-fledged greenhouses, which take up a lot of space and often simply do not fit into the size of standard plots, is increasingly being used by summer residents.
These designs are great for growing seedlings, some low-growing crops, and even small amounts of vegetables such as cabbage, carrots or peppers. Mini greenhouses are often used to grow herbs and radishes in early spring.
Helpful advice!If you plan to grow several crops in a greenhouse at once, ask in advance how well they get along with each other. For example, if you plant sweet and bitter peppers together, then cross-pollination will occur.

An example of the implementation of a mini greenhouse of an unusual shape with a polycarbonate coating
The most popular options for mini greenhouses for giving with your own hands
There are several options for constructing mini greenhouses, which are most often preferred. Let's briefly consider the features of each of them, we will try to determine how they differ and which of the options is better to give preference to:
- Home mini greenhouse. This design is small and can even be installed on a windowsill. The mini greenhouse is suitable for year-round use and, despite its modest size, can be a source of fresh greenery for the whole year. Such a greenhouse looks like a reduced street greenhouse.
- An arched-type outdoor greenhouse is a tunnel. Film or polycarbonate is used to cover it. And the installation procedure is quite simple.
- A portable greenhouse is a mobile structure, in fact, which is a sealed cover that covers the plants. This is an excellent solution for small areas, as it allows you to cover plants in the open field during the cold season.
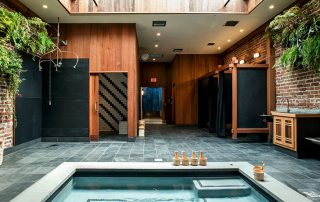
- A deep greenhouse implies partial burial of the structure, which allows you to better maintain the desired temperature inside. In addition, this technology allows you to provide plants with additional heating and maintain a positive temperature, even if it is severe frost outside.
- The barrel is a mini greenhouse, which has two opening doors. By its structure, it is a bit like a butterfly. This is a very convenient option that allows you to easily care for all the plants planted inside.
- A snail or bread bin is an easy-to-install and convenient option. The design got its name due to the similarity with a regular bread bin, opening according to the same principle.
")
Diagram of a mini greenhouse made of sheet polycarbonate (1 - greenhouse base; 2 - back and front walls; 3 - roof slopes; 4 - roof top)
Of course, in order to avoid hassle, you can also purchase a ready-made greenhouse from one of the popular manufacturers, however, many choose home-made designs, preferring to make a greenhouse that is ideal in size and characteristics. In addition, thanks to the presence of drawings, a greenhouse with your own hands is more than a feasible task for everyone.
Recessed mini greenhouse made of polycarbonate
The recessed design is one of the easiest to implement and is great if you want to get things done quickly. In addition, it is very easy to arrange heating in this case.
The greenhouse can be of any size in length, although usually they are not more than 3 meters. But for the width there are very clear restrictions - no more than 1.5 m. This is dictated primarily by the ease of use: if the structure is wider, then it will be difficult and inconvenient to use it. Well, a narrower greenhouse simply cannot accommodate the required amount of seedlings.

The design of a deep polycarbonate greenhouse allows you to equip a warm bed inside
Depending on the conditions in which the greenhouse will be operated, one or another level of deepening is selected. It all depends on the temperature: 80 cm - ideal for low temperatures, 30 cm - for use in warmth. In this case, the soil is only the upper 20 cm, and everything else is filled with manure, which will give heat during the discussion.
In order to frame this pit, wooden beams are used, 100-150 mm thick. It is extremely important to carefully treat them with special anti-rotting agents. For this purpose, hot linseed oil is suitable. Sometimes you can use pieces of old linoleum as a winding.
Depending on the type of roof, structures of this type are divided into arched, single-pitched and gable. Consider the simplest option - single-slope. Such a frame is easy to assemble from wooden beams, first fastening the side parts of the structure with self-tapping screws.They are triangles, the lower part of which corresponds in size to the width of the prepared foundation pit.
After that, the finished triangles are fastened to each other using bars, the length of which corresponds to the size of the pit. The lower and upper beams also need to be fastened using several (usually 2-3) rails. At this point, the assembly of the frame can be considered complete.

Often, the Breadbasket model is used for a deeper location of the greenhouse
After that, all sides, with the exception of the bottom, are covered with polycarbonate. Fastening is done with self-tapping screws. There is no opening or folding part in this design, therefore, in order to gain access to the plants, you will need to completely remove the greenhouse.
Helpful advice! As a minimum means for sealing the places where polycarbonate meets wood, you can use ordinary tape.
How to make a mini greenhouse with your own hands: a mobile structure
According to its technical characteristics, the mobile mini greenhouse is in no way inferior to the in-depth version. It perfectly retains heat and creates all the necessary conditions for comfortable growth and development of plants. However, this model is more suitable for use in conditions of stable temperature, which is more typical for the second half of spring.

Lightweight polycarbonate can bend easily, so it can be used for a small greenhouse and even cut holes with a construction knife
Due to the presence of wheels of this design, the greenhouse can be easily moved from one place to another, choosing the most suitable place on the site.
For manufacturing you will need:
- support frame;
- plywood sheet;
- two bars;
- four-wheeled device;
- polycarbonate;
- self-tapping screws.
The support frame is made of small-thickness bars, fastened together with ordinary self-tapping screws. At the same time, the wheels are attached to the rack legs, and the side bars are also used as a harness to which the rafter legs can be attached. At the top of the structure, you need to make a roof using wooden frames, to which polycarbonate sheets are attached.

Polycarbonate can be used to cover both large greenhouses and small greenhouses
This type of greenhouse must open, and therefore it is worth taking care of the presence of folding doors on the end parts of the structure. The bottom, which is made of plywood, needs to be covered with a film and covered with a layer of manure and soil, which will be an excellent breeding ground for the root system of plants.
Such, at first glance, unusual greenhouse is an excellent alternative to the usual, stationary structures, because thanks to the lightness of all materials and small size, it will not be difficult to move it to another place.
Do-it-yourself drawings of a polycarbonate greenhouse of this type are not very common, however, thanks to a rather simple device, it is gradually gaining popularity and summer residents are increasingly using it to grow seedlings.
DIY arched polycarbonate greenhouse
In order to make a simple arched polycarbonate greenhouse, you will first need metal or plastic pipes, the length of which will correspond to the size of the arch. Each element flexes and attaches to the base. The only difficulty is that it is rather difficult to make good opening sashes on such a frame. It is for this reason that for arched greenhouses, plastic wrap is more often used as a covering material, rather than polycarbonate.

Photo of the installation of an arched greenhouse using wooden beams and polycarbonate coating
For cladding a small arched greenhouse, one sheet of polycarbonate will be quite enough, which can be cut into 4 parts. One of them should be larger, and the remaining three should be smaller. You can use a sharp construction knife to cut.
When everything is ready, you can proceed to fastening the polycarbonate to the frame. To do this, the sheets are laid on the ground and attached to the even frame elements laid on top. They need to be arranged so that the wide side of the polycarbonate sheet is along the bar. We overlap each sheet with self-tapping screws and glue the joints with tape.
Helpful advice! Be sure to pay attention to which side you have the polycarbonate on. It is imperative that the sun protection film is on the outside and not on the inside.
After that, you need to bend the entire resulting structure so that you get an arch. Using the chosen mounting method, we fix each frame element on the base so that the entire greenhouse is securely fixed.

Arched greenhouse scheme using plastic pipes
It remains only to close the ends. To do this, take a sheet of polycarbonate and apply it to the hole. Mark the borders with a regular marker and cut off the piece we need. Then we attach it to the frame according to the standard scheme.
As already mentioned, this design does not provide for opening doors, therefore, in order to take care of the plants, you will need to completely raise and remove the frame. But in order to add comfort, you can add small vents for ventilation, taking them into account in the drawing of a polycarbonate greenhouse with your own hands. Photos of such greenhouses can be seen on the Internet or on specialized sites.
Of course, this design is far from perfect, but if you want to make a simple greenhouse without spending a lot of money and time on it, then this option is ideal. After all, everyone can figure out how to assemble a polycarbonate greenhouse of such a simple design with their own hands.
What you can use homemade greenhouses for
Having paid attention to the small size of most greenhouses, a natural question arises about what they are used for. After all, it is quite obvious that most of the adult plants simply cannot fit in such a small structure. However, mini greenhouses occupy their own niche in gardening and are used for forcing seedlings, as well as creating optimal conditions for germinating seeds.

A large number of different plants can be grown in greenhouses, but it is worth considering whether they are combined with each other
Most often, greenhouses are used to grow such plants:
- Strawberry;
- greens;
- flowers;
- undersized vegetables;
- seedlings of any plants;
- small bushes.
It is perfectly acceptable to completely grow vegetables such as tomatoes, cucumbers, eggplants in greenhouse conditions. However, mature plants require ample space and nutrients. But if you take care of this, you can enjoy fresh vegetables a few weeks earlier.
Not so long ago, the height of greenhouses was a very conditional indicator and the planting of seedlings was carried out by eye in such a way that by the time the structure was small for plants, they could be transplanted into open ground. But today, numerous reviews on forums and thematic sites make it possible to determine the correct timing for each plant as accurately as possible and prepare a greenhouse of a suitable size for them.

In most cases, mini greenhouses are used for growing seedlings of vegetable crops.
Mini greenhouses are perfect not only for growing vegetables, but also for planting cuttings of decorative flowers, which are quite demanding on the air temperature.
Helpful advice! For growing rose bushes, it is better to equip a special "kindergarten" in which the plants will feel as comfortable as possible. And in this case, you do not have to replant them as soon as they grow up.
How to assemble a polycarbonate greenhouse: video assembly instructions
As you can see, there are many different options for greenhouses for which polycarbonate can be used as a covering material. So the owner of the site, who wants to install such a structure in his country house, can only choose the most suitable design and make a polycarbonate greenhouse with his own hands, taking into account all the advice and recommendations of specialists.