The modern furniture market is distinguished by a wide range of designs used for different purposes. Wall shelves are no exception, but it is far from always possible to find the necessary option that matches a specific interior. In this case, you can place an order for the production of an individual design or assemble it yourself. But first you need to familiarize yourself with the common types of shelves.

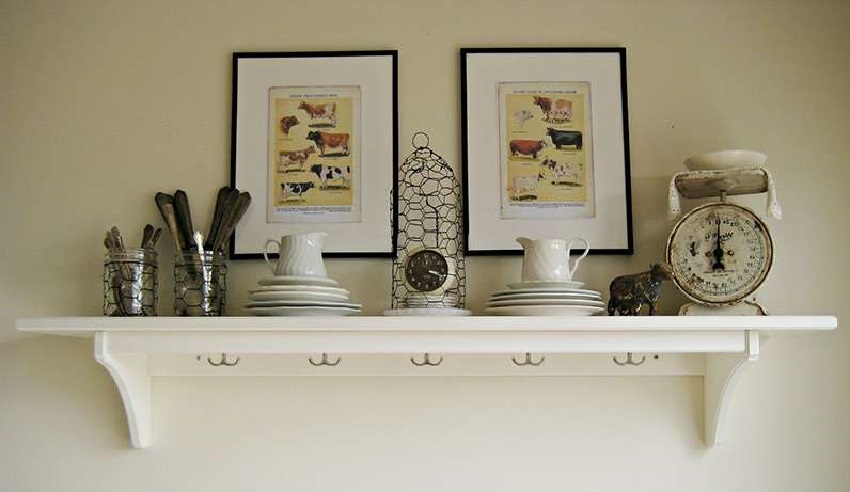
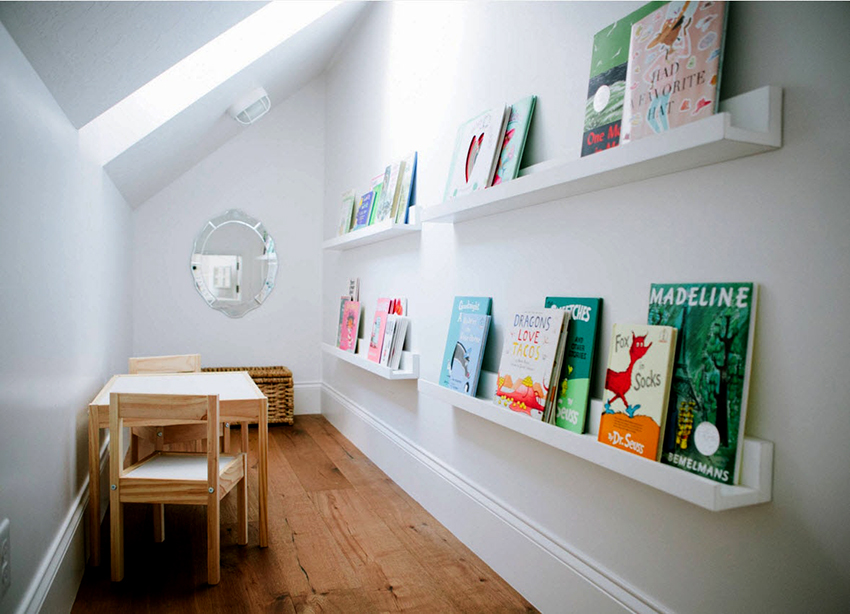
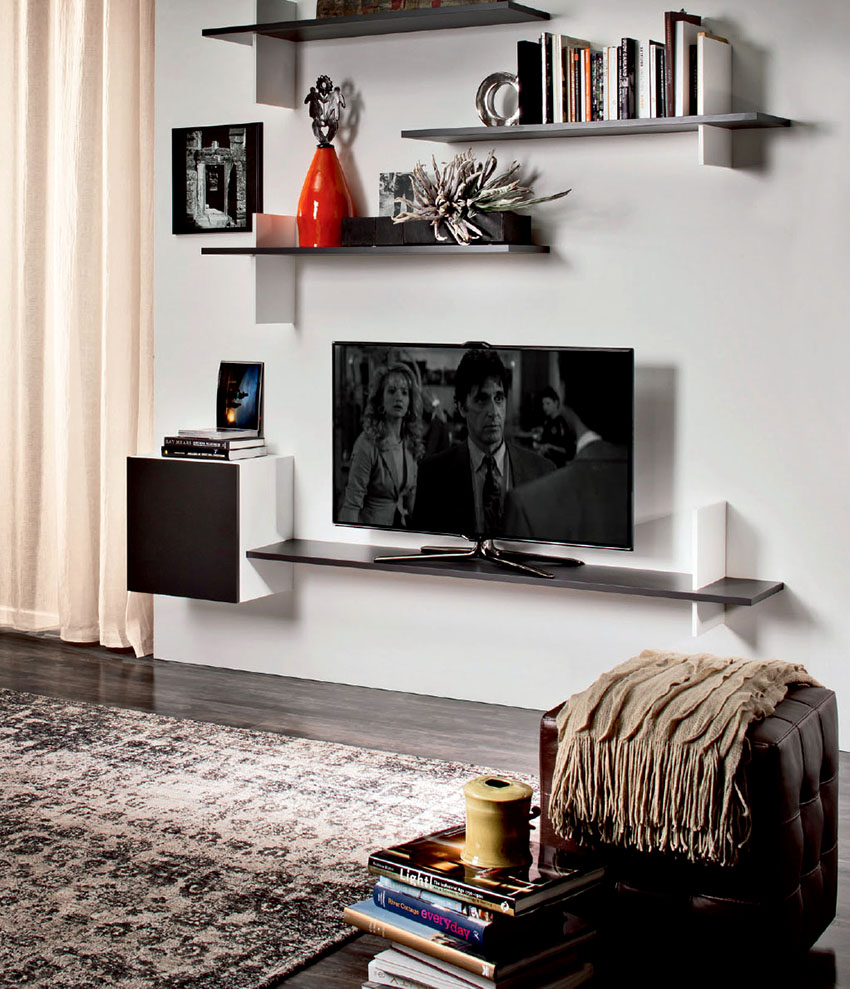
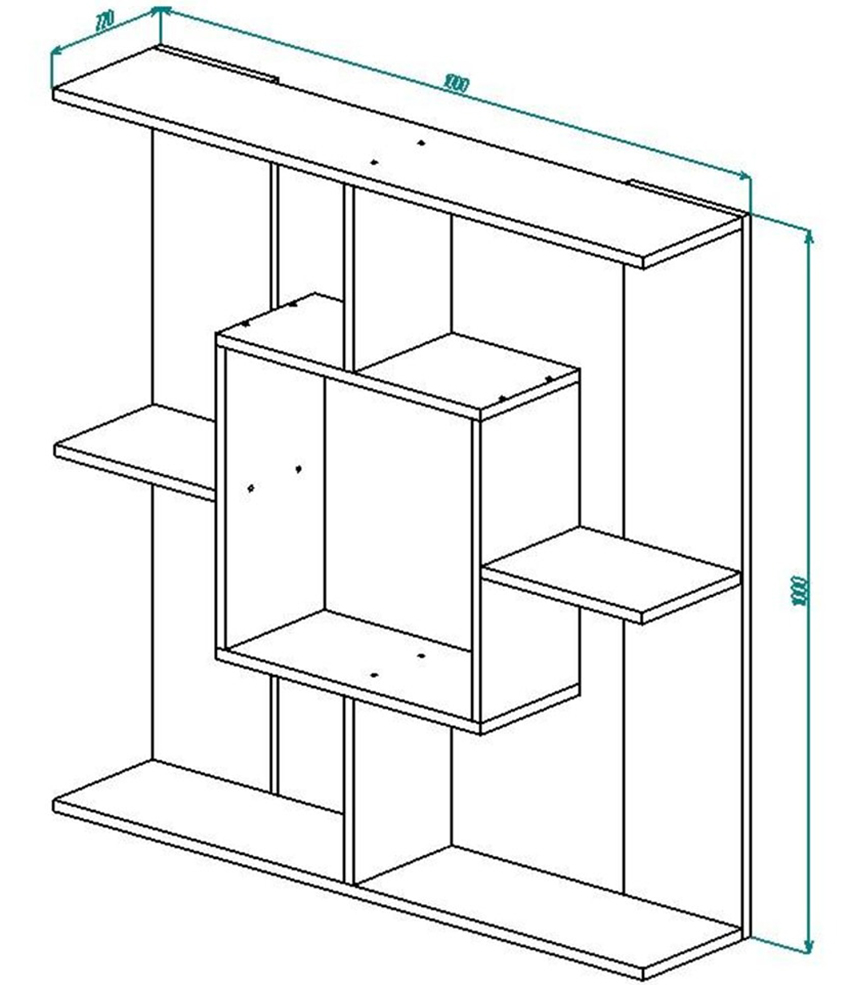
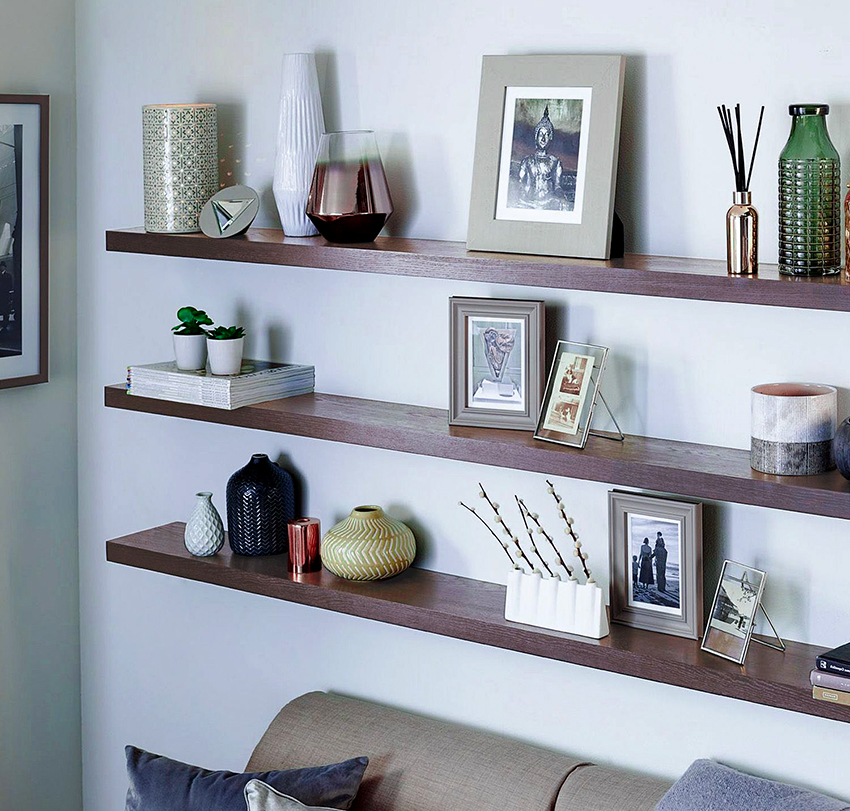
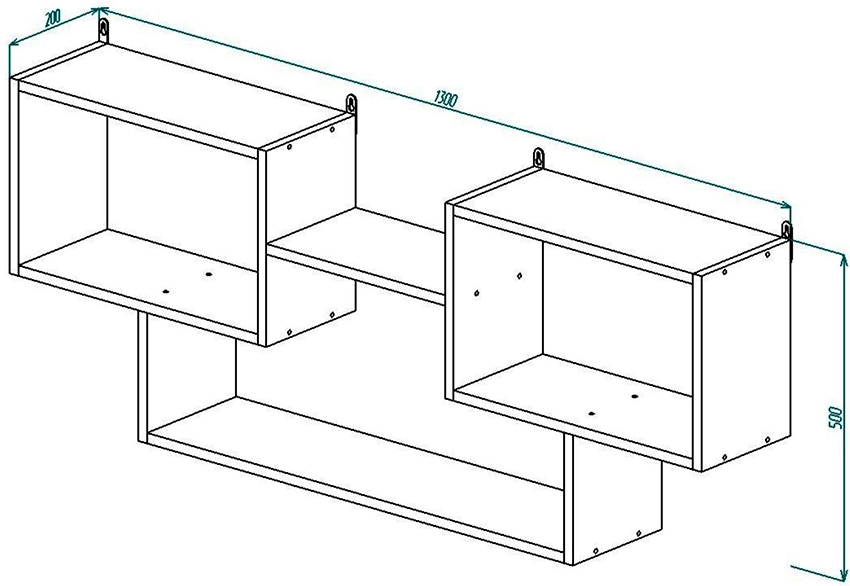
Classic rectangular shelves are a recognized example of style
Content
- 1 Recommendations for choosing the right shelf for the wall
- 2 What materials are used to make do-it-yourself shelves
- 3 Wall shelves: the most common types of designs
- 4 How to fix a homemade wall shelf: photo
- 5 Wall shelves: tools needed for making
- 6 What you need to consider when drawing up a shelf drawing
- 7 Assembling a classic wooden shelf with your own hands
- 8 DIY corner wall shelf: assembly algorithm
- 9 How to make a hanging shelf: round design
- 10 How to make a wall shelf yourself
- 11 How to make a pipe rack with your own hands
- 12 DIY wall shelf for books: preparing tools and materials
- 13 Making a wooden shelf for flowers with your own hands
- 14 DIY plywood wall TV shelf
- 15 Custom solution: construction pallet shelf
- 16 Features of the decor of wall structures: how to decorate the shelf
Recommendations for choosing the right shelf for the wall
Wall-mounted shelves are a good alternative to oversized cabinet structures made of wood, plywood and other materials. One of the main advantages of such furniture is that it does not take up much space. This saves usable floor space. Visually, such products look much more attractive than standard cabinets.

Sometimes shelves are made as independent art objects.
Wooden shelves look great in modern interiors (for example, high-tech). They can be purchased disassembled. The assembly is done independently. If necessary, products are made by hand. The second option allows you to save finances and bring originality to the interior of the room.
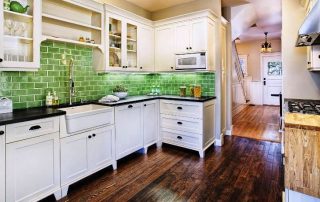
Wall mounted shelves can be installed in any room. This can be a living room, bedroom, kitchen or bathroom. Homemade designs are also suitable for hallways. In this case, they can be adapted to fit shoes.
First you need to determine what the shelf will be used for. This will allow you to calculate the required dimensions of the structure, mounting options, etc. The shelf for the home can be designed to store books or beautiful dishes. Quite often, such designs are used for indoor plants.
Note! In the bathroom, a homemade shelf can be adapted to accommodate cosmetics. In this case, there is no need for reinforced fasteners. The bathroom is characterized by high humidity, so the material for the products must have good resistance to this factor.

Correctly selected color of the shelf will add sophistication to the interior
In some situations, the shelves are made as independent art objects. This design solution allows you to decorate the room in an original way, make it more habitable and comfortable. In this case, there is no need to organize a solid structure. The material for an independent design element is selected depending on the style of the room and the individual preferences of the owners. To make wall shelves, you need to pay attention to the following points:
- load on the structure;
- fixation option;
- functionality.
The material used for the manufacture of these products must correspond to the purpose of the room in which the installation is planned. In addition, it is necessary to determine in which design the structure will be made.
What materials are used to make do-it-yourself shelves
Before proceeding with the assembly and installation of shelves, you must select the material from which they will be made. There are a lot of options in this case. Most often, the following are used for the manufacture of such interior elements:

Wall shelves are an alternative to large structures made of wood, plywood and other materials
- wood;
- glass;
- plastic;
- metal;
- Chipboard;
- drywall.
Wood. This material is a classic option and is most often used for assembling shelves. This is due to the ease of processing and the presentable appearance of the wood. Thus, such material is most suitable for making a shelf on the wall with your own hands. Wooden products have one drawback - weak resistance to high humidity. Therefore, it is not recommended to use such designs in bathrooms.
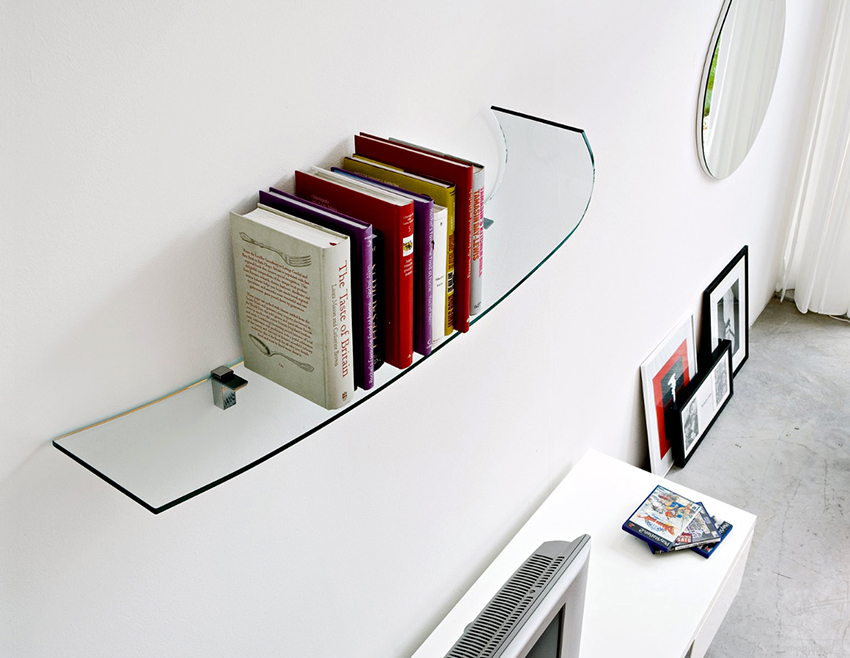
Glass. It is used when it is necessary to decorate the interior of the room in a modern style. It goes well with cold tones: white, gray and black. It is much more difficult to make shelves from glass material than from wood. In such a situation, you will need to purchase a special tool for cutting glass and master the basics of working with it.

Wood is a classic option for the manufacture of shelves of varying complexity.
Plastic. Plastic products have one advantage - an affordable price. The market for such designs is replete with various devices. You can make many do-it-yourself shelves from plastic. Photos of products will help you choose the desired design and size. Plastic pieces of furniture are installed in bathrooms and balconies. This is because they are moisture resistant.
Metal. The shelves made of this material are highly durable and presentable in appearance. Forging elements can be added to such designs.
Note! For self-production of a fully metal structure, you will need to purchase welding equipment. If the metal is planned to be combined with wood or some other material, then special fasteners are used.
Chipboard. This material has an affordable cost and is used to assemble various furniture, including the design of shelves.The manufacturing technology in this case resembles the algorithm of actions used when assembling a wooden product. Chipboard, like wood, is not resistant to moisture. An alternative to chipboard structures are plywood shelves. It will not be difficult to make a product from this material with your own hands, since it is quite simple to process.

Bathroom shelves are made of moisture-resistant materials or varnished
Drywall. This material is very popular in construction. It is used for many purposes, including when it is necessary to organize shelves in the form of niches. Such designs are popular, and their organization does not require large financial costs.
When choosing a material for the manufacture of shelves, you should focus not only on the financial aspect. It is very important to evaluate your own skills and abilities and, guided by this, choose the appropriate type of product.
Wall shelves: the most common types of designs
The versatility of modern tools allows you to make products of any complexity. Before you start assembling shelves, you need to decide on its type. Their operational accessibility depends on the design features of these interior elements. Let's consider the most common types of shelves.
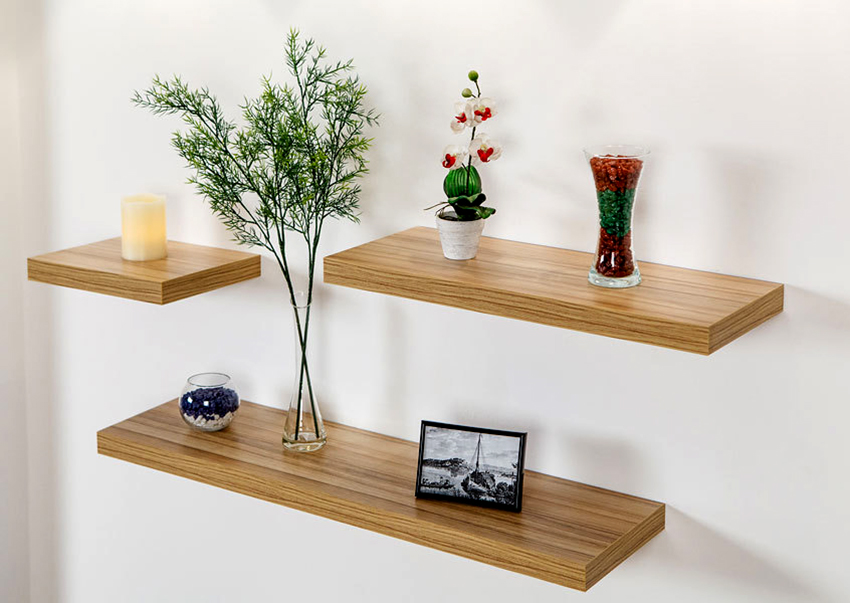
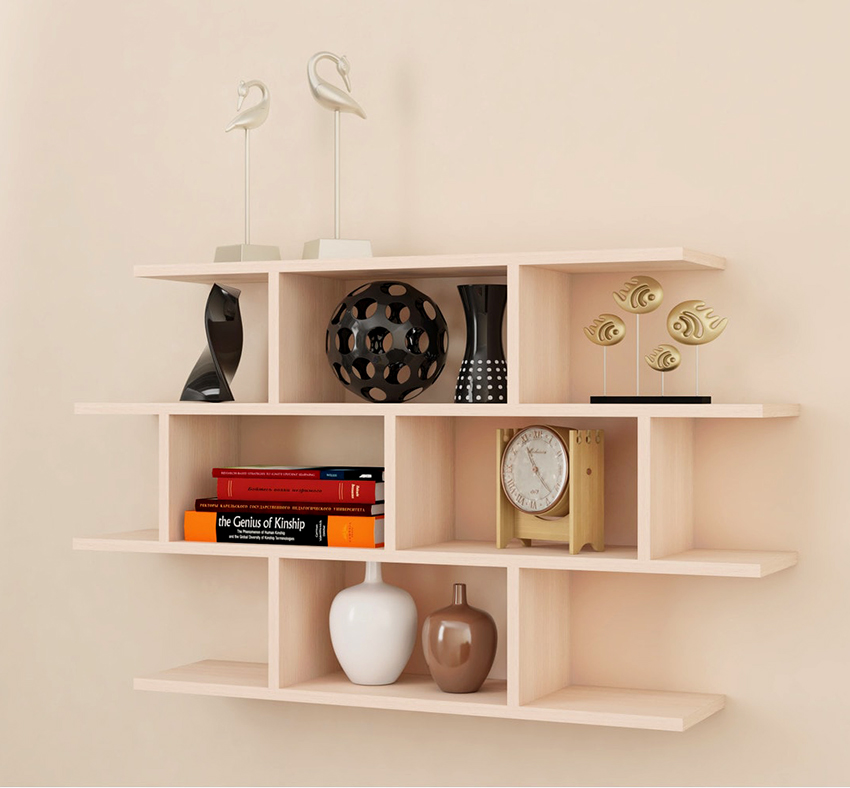
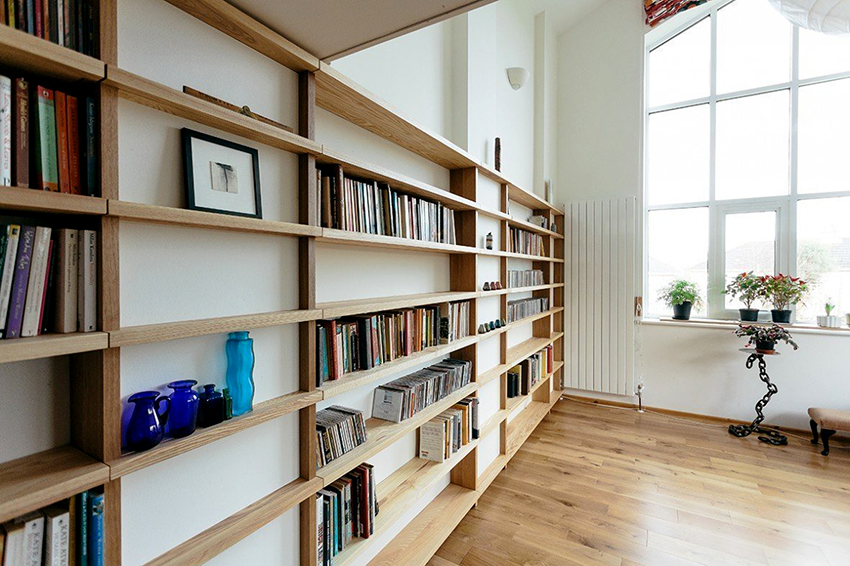
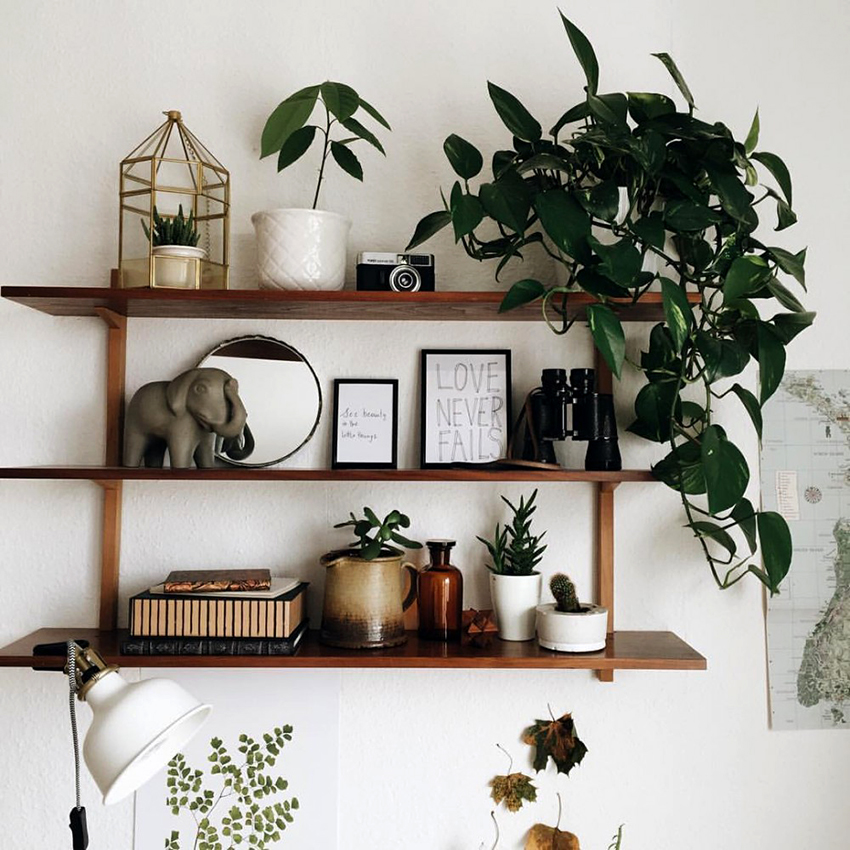
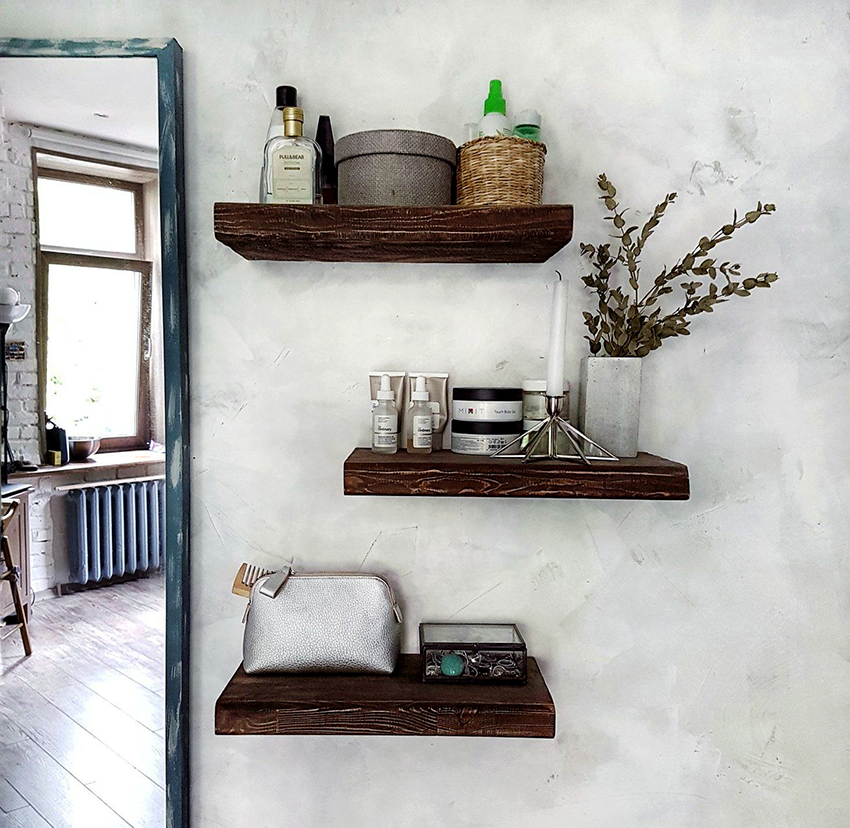
Standard. Classic rectangular structures that are mounted on walls are a generally recognized example of style. Homemade shelves of this type are considered the most popular. To complete them will not be difficult for any person who does not have special knowledge and skills.

To save room space, hinged shelves are installed
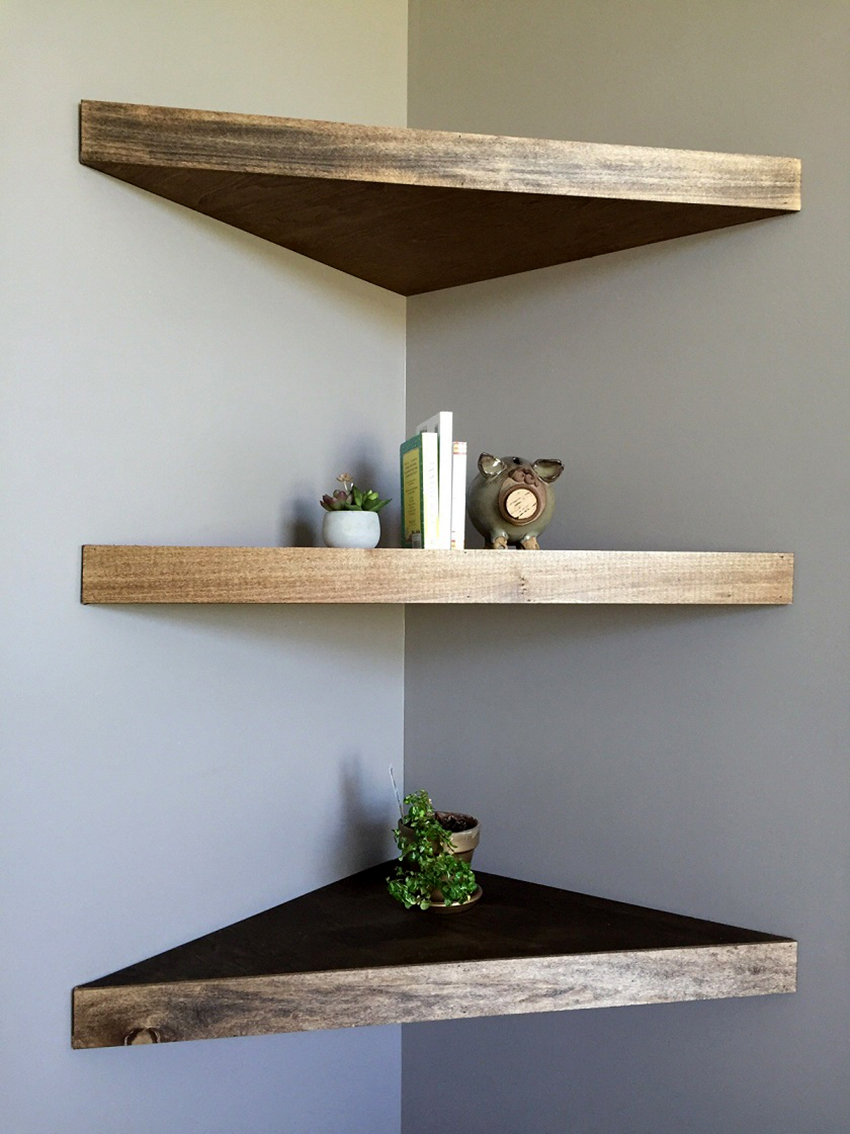
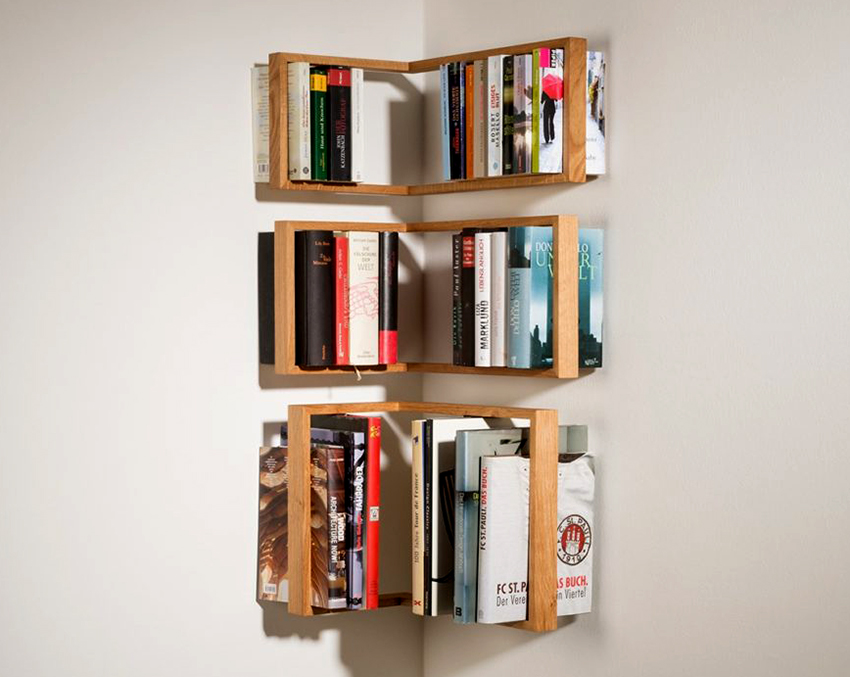
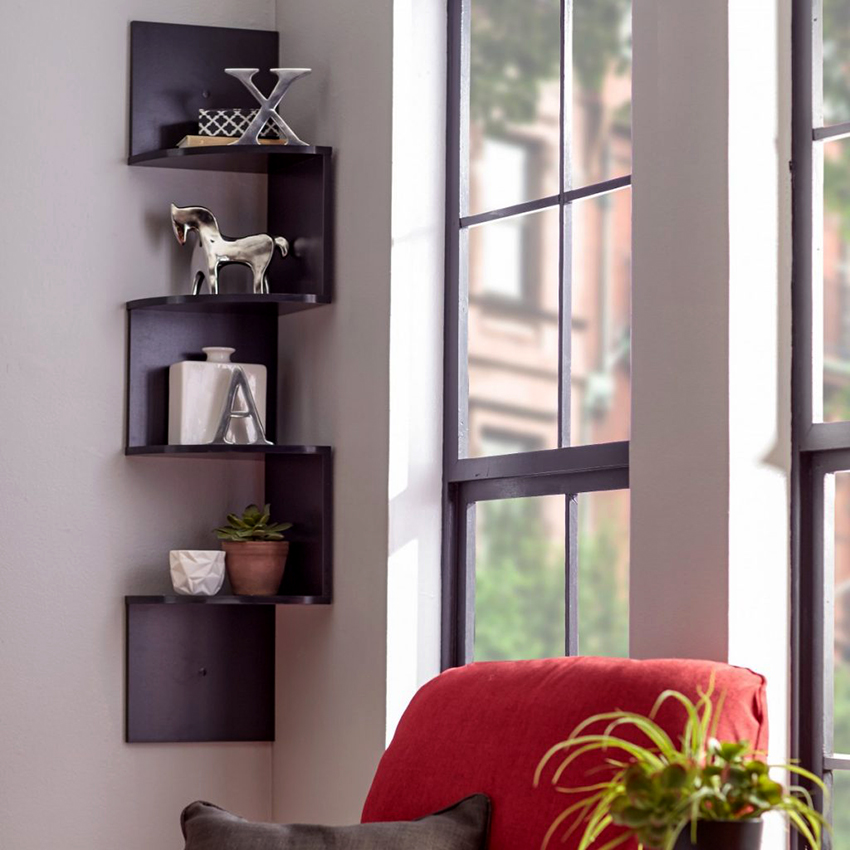
Corner. Such products differ in that they have a triangular structure. They are fixed in the corners of the rooms. Fasteners are installed in both walls. Experts recommend using such shelves if it is necessary to save as much as possible the useful area of the room. Most often, corner products can be found in the bathroom or kitchen.
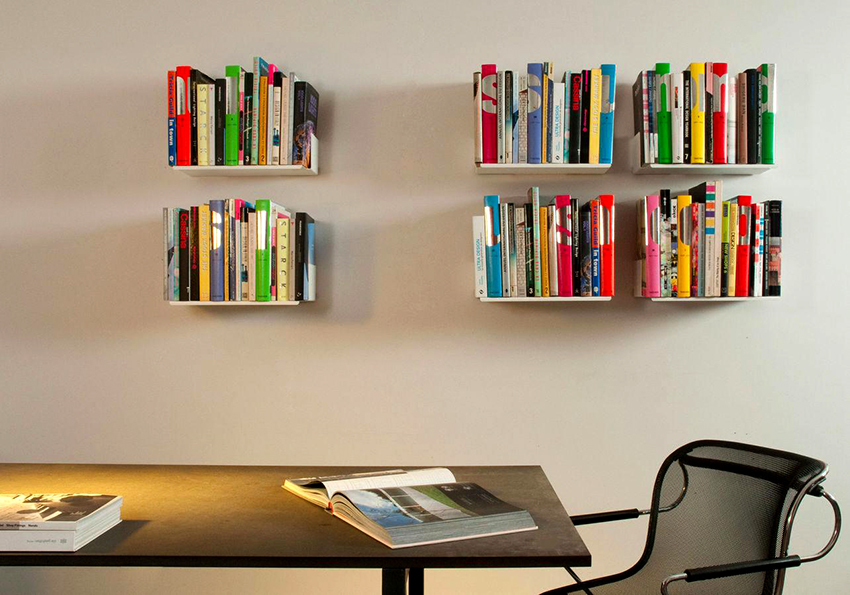
Hinged. It is customary to install such shelves only on a flat surface. As a rule, they are located above the average. This is required to save room space. Photos of hinged shelves allow you to evaluate their advantages over the classic version.
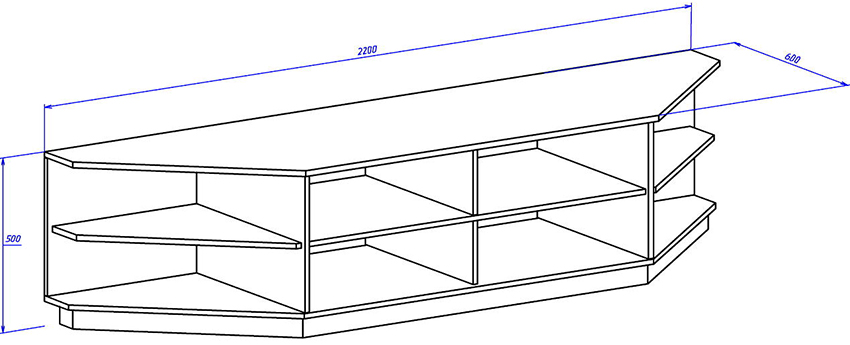
Outdoor. Structures of this type are most often installed on legs and are not equipped with additional fasteners. In some cases, they are still fixed to the wall, which can significantly increase their stability.
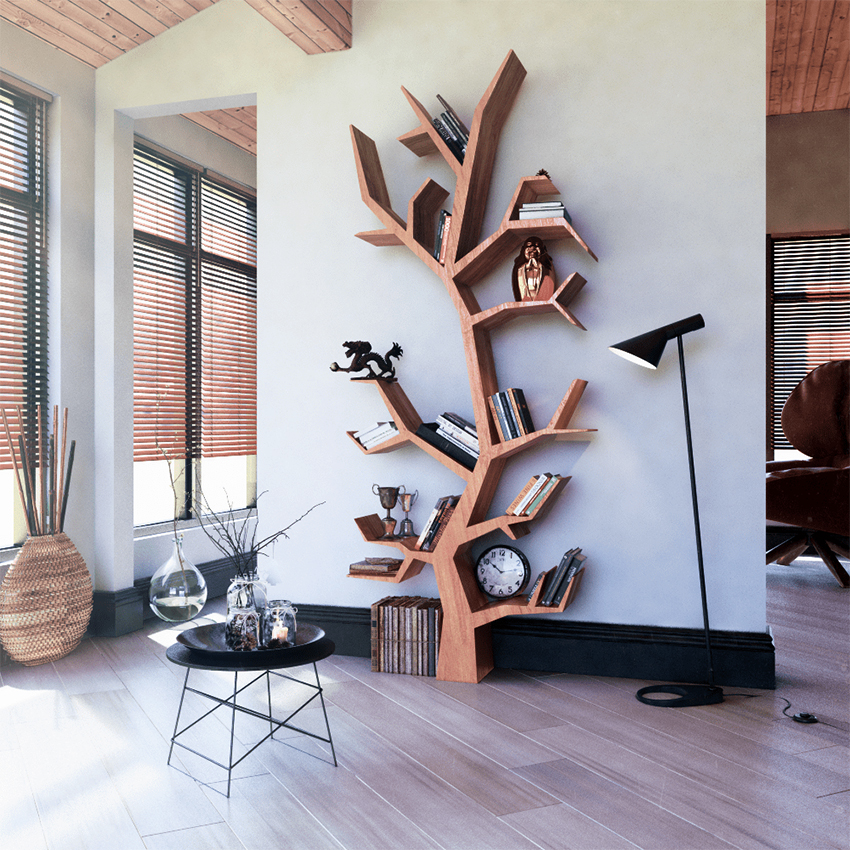
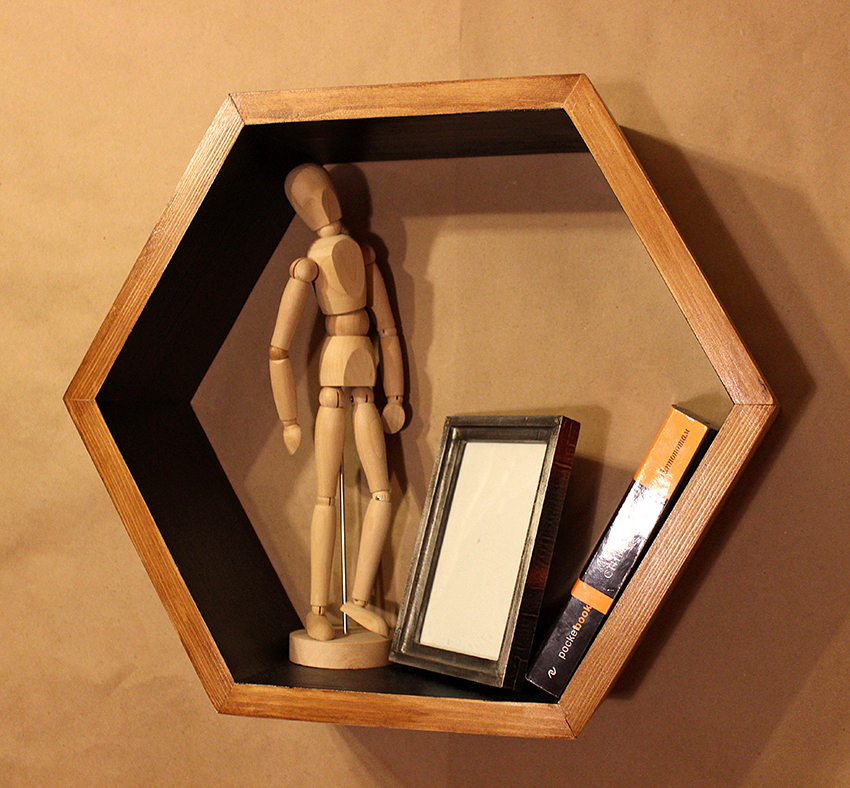
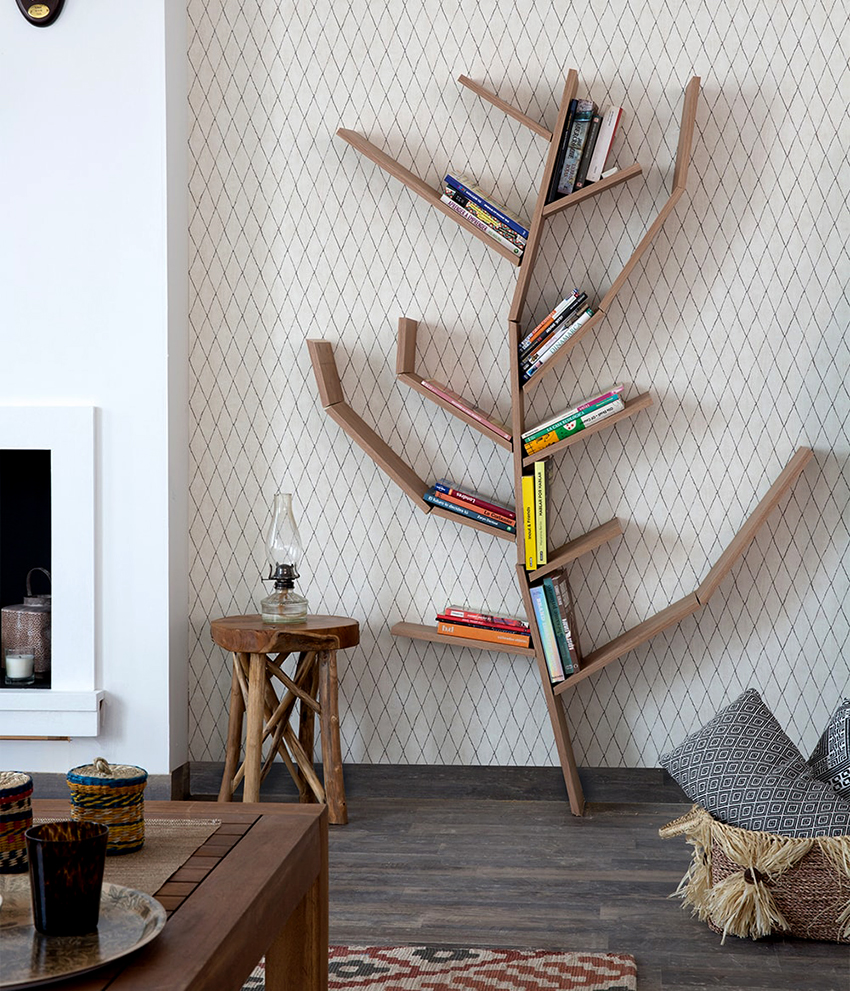
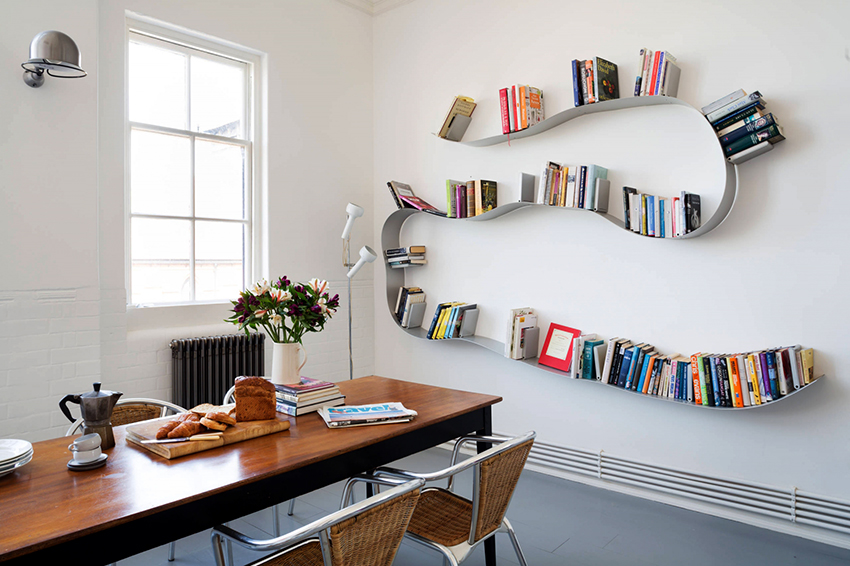
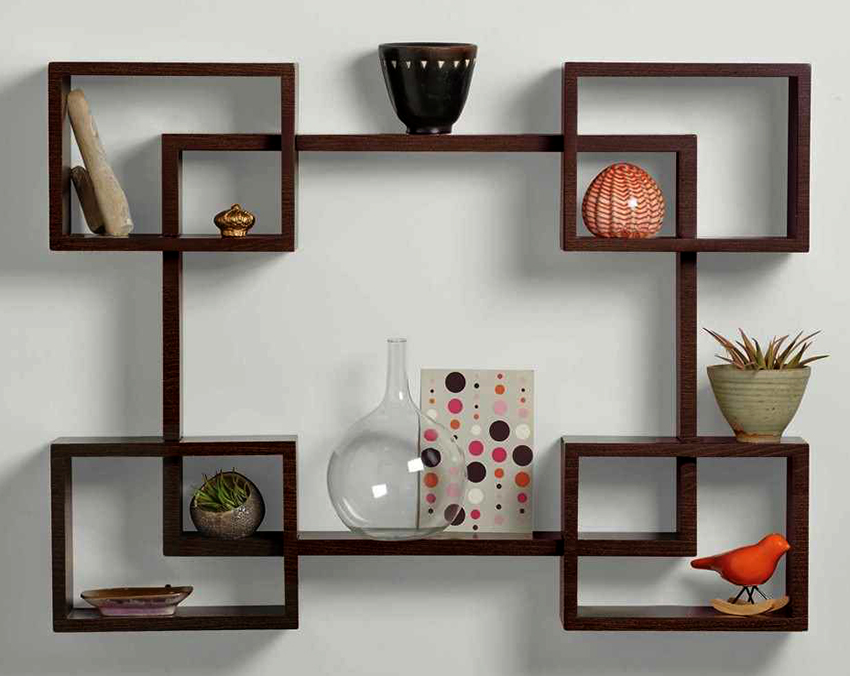
Mods. Unusual shelves, individual elements of which have unique dimensions. The direction in which the modes are made has a lot in common with abstractionism.

In a classic style, wooden shelves will look very natural
Helpful information! Unusual shelves on the wall can emphasize the style of the room and give it originality.
Exclusive. Such products are made from various materials at hand. In this case, everything depends on the imagination of the master. The material for their production can be construction pallets, plastic containers, etc.
How to fix a homemade wall shelf: photo
The fixing option depends on which device the product has. A very important factor influencing the choice of fasteners is the material from which the shelf is made.
Classic structures, for which wooden materials are used, are fixed to the walls with hinges. It is very important to pay attention to the width of the product: it must be sufficient, otherwise it will simply not work to install the hinges.

The shelves are fixed to the walls with hinges or brackets
In order to fix the loop, you will need to prepare self-tapping screws. This method of fixing the shelf to the wall is the least labor-intensive. The hinges are attached to the end face of the shelf. After screwing it is necessary to mark the holes on the wall.To do this, you need to attach the shelf to the work surface.
It is very important to ensure that the structure is located in a strictly horizontal position. Then holes are made in the places of marks, and dowel-nails are inserted into them. After that, the shelf is hung.
There are other mount options that have a slightly different mounting method. One of them allows for the use of brackets. This method is simple and allows you to quickly make a shelf in the room.
The most interesting way to fix glass shelves is without support. In this case, special hidden fixing elements are used, which are located in the shelf body. In order to perform such a fastening, it is necessary to drill holes in the end part of the product.

The shelf can even be secured with hanger hooks
However, not all materials can be fixed using such methods. Many of them are not designed for drilling holes. Glass is an example in this case. So how do you secure a glass shelf? This is a more complex procedure that requires care and accuracy.
Related article:
Wall hanger in the hallway: a visiting card of every home
How to choose the shape and size based on the parameters of the hallway. Mount options. Self-made products.
Glass shelf mount: how to fix it yourself
To fix the glass structure to the working surface, special fasteners are used. Most often they consist of 2 parts. Glass is installed and clamped between them. For cushioning, it is customary to use gaskets that are made of elastic materials. The lower part of this type of holder is equipped with a special screw. When tightening it, the sashes clamp the glass.
Note! Making a glass shelf is more difficult than making a wooden one. To do this, you will need a special tool - a glass cutter. It is important to remember that you should clearly follow the instructions when making such a shelf with your own hands. Photos of homemade glass structures, as well as training videos will help you to correctly assess your own capabilities.

For fixing glass shelf use a special fastener "pelican"
The most common type of glass fastener is the “pelican” clamp. Such a clamp has a presentable appearance, which is why it is often chosen for installing glass products. It can be of different colors, which allows you to choose a retainer in accordance with the peculiarities of the color palette of a particular interior. This element is used for mounting glass shelves, the thickness range of which varies from 8 to 34 mm.
Clamps can also be used to fasten other materials. However, with glass products, such clamps look as organic as possible. To assemble a wall shelf with your own hands from glass, you need to purchase material and, accordingly, the clips themselves. It is best to buy glass with finished edges. After purchasing all the necessary elements, you can proceed to the direct assembly of the shelf.
The first step is to fix the clamps on the work surface. In the wall, you need to make two holes on both sides. They should correspond to the points where the glass bookshelf or any other structure that uses similar materials will be fixed. Dowels are installed in them.

Next, you need to remove the decorative strip from the mounting plate, under which there are 2 holes. After the clamps are fixed on the wall, insert glass into them and tighten the adjusting screw.
Wall shelves: tools needed for making
The selection of tools is a very important preliminary stage, on which the convenience and efficiency of work will depend. In order to make a wooden blank, which will be the basis of the shelf, an electric jigsaw is most often used. Of course, you can use a hand tool, but then it will take more time to complete the part.
After cutting the workpiece, you need to grind it. To do this, use special grinders. It is worth noting that the attachments should be of different grain sizes - for rough, as well as more gentle work. This manual operation can take several hours.

For the manufacture of wooden shelves decorated with carvings, you need a special tool
The set of tools may differ depending on what material has been selected as the base for the shelf. You can make products of any complexity with your own hands from scrap materials.
You will also need an electric drill to assemble the shelf. This tool is especially necessary in the case when chipboard is used in the assembly of the structure. A screwdriver or an ordinary screwdriver is used to tighten the screws.
Note! An ordinary screwdriver is used only when the shelf design is simple and does not involve many fasteners. If there are a large number of fixing points, experienced craftsmen recommend using a screwdriver.
To secure the fixing elements, you will need to purchase screws. Shelf corners are also mounted using self-tapping screws. If necessary, you can hide the screw heads under special plugs. These items are selected depending on the color of the shelf.

The grinding machine speeds up the processing of parts several times
Untreated wood has a less presentable appearance, so it requires finishing with paint and varnish material. The lacquer coating also increases the moisture resistance of the material. It is applied to the shelf using brushes ranging in size from 40 to 80 mm. Another tool that simplifies the installation of the structure is the square. It aligns all corner joints.
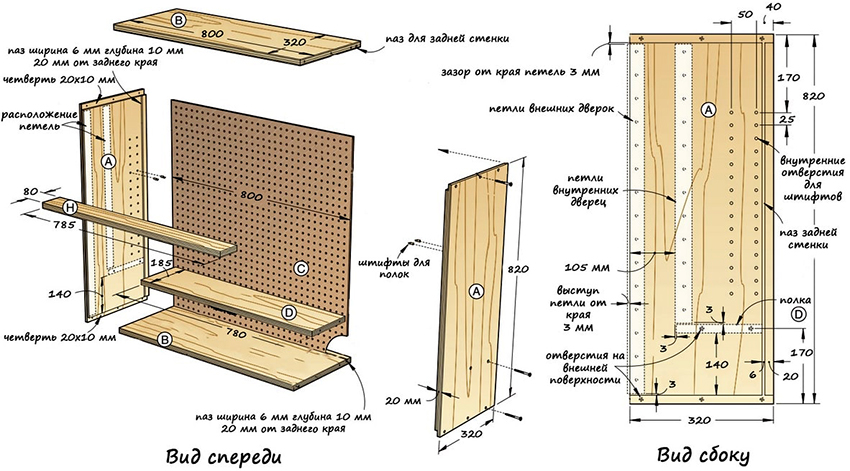
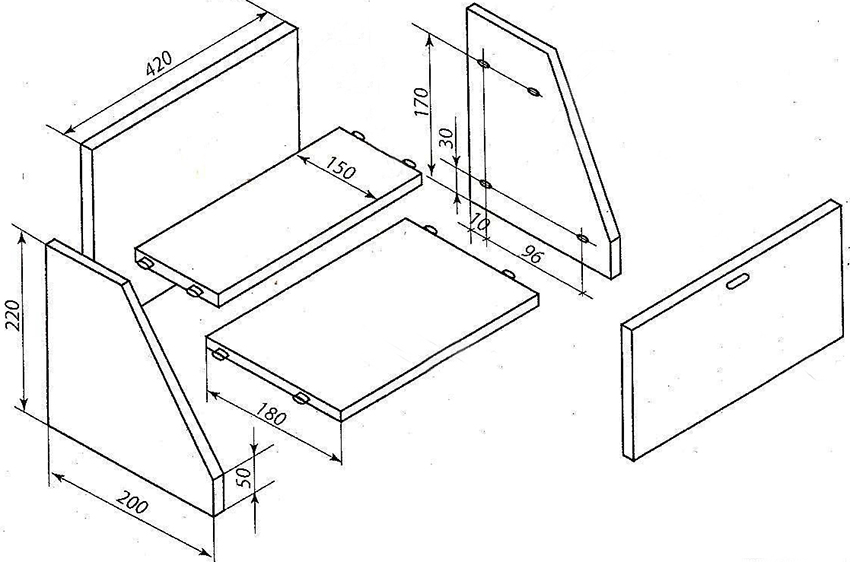
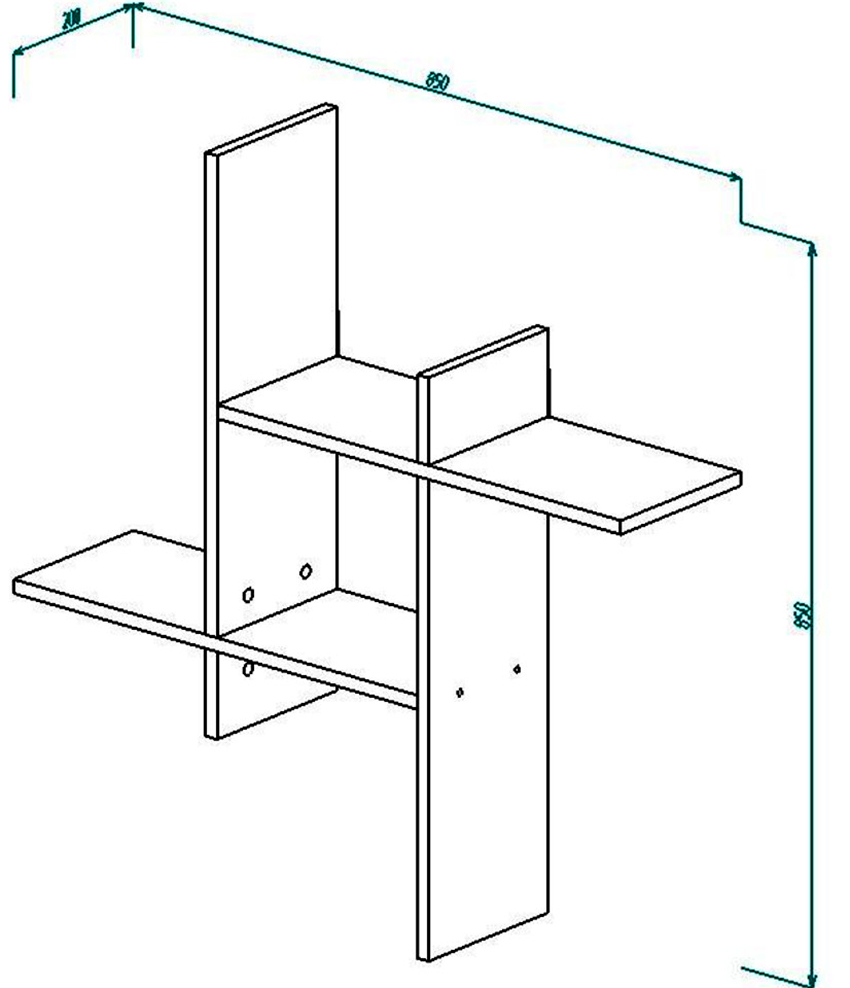
What you need to consider when drawing up a shelf drawing
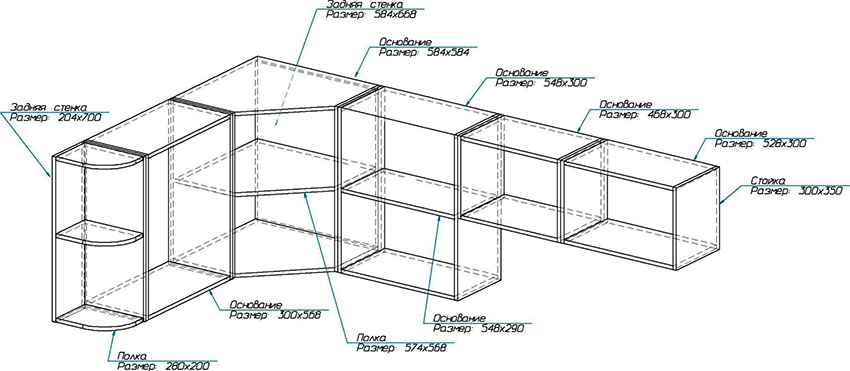
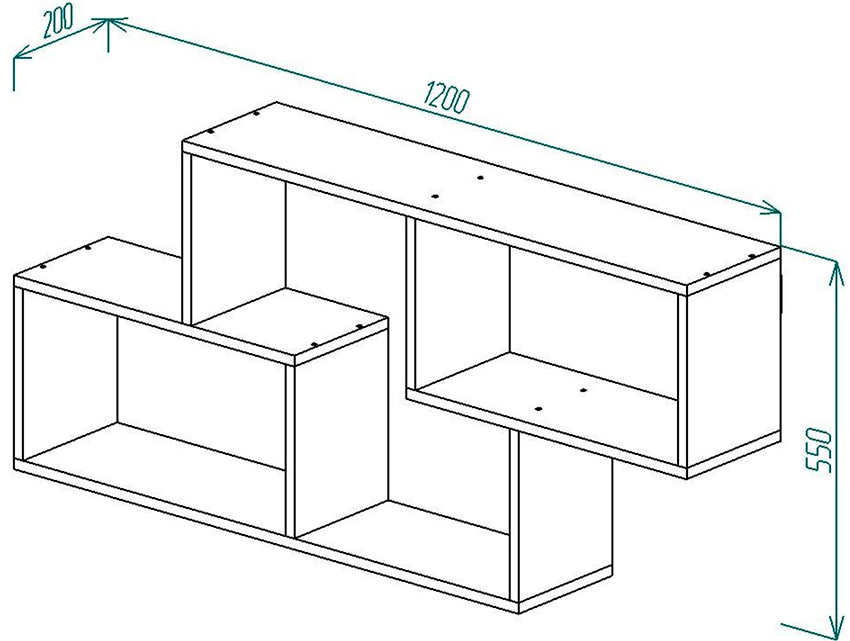
In order not to make a mistake during the installation of the shelf, it is recommended to prepare a preliminary drawing. In the diagram, all sizes and the number of fasteners must be indicated.
A wooden shelf with your own hands can be made both according to individual drawings, and according to ready-made ones, which can be found on the Internet. The finished drawing can be corrected, if desired, by supplementing it with the necessary parameters.
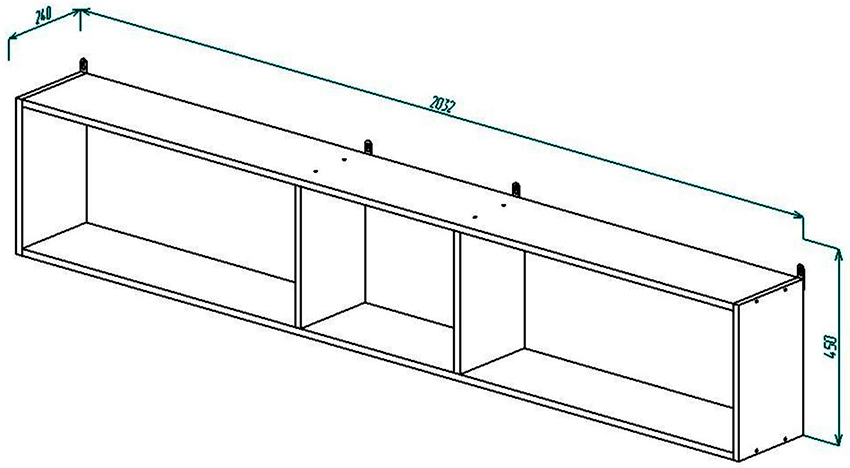
It is important to remember that some materials have strength limitations. For example, a shelf can be made of 16 or 18 mm fiberboard, but it is worth considering that the distance between the fasteners should not exceed 1 meter. Otherwise, the structure will bend under its own mass and the weight of objects located on it. The same applies to plywood shelves.

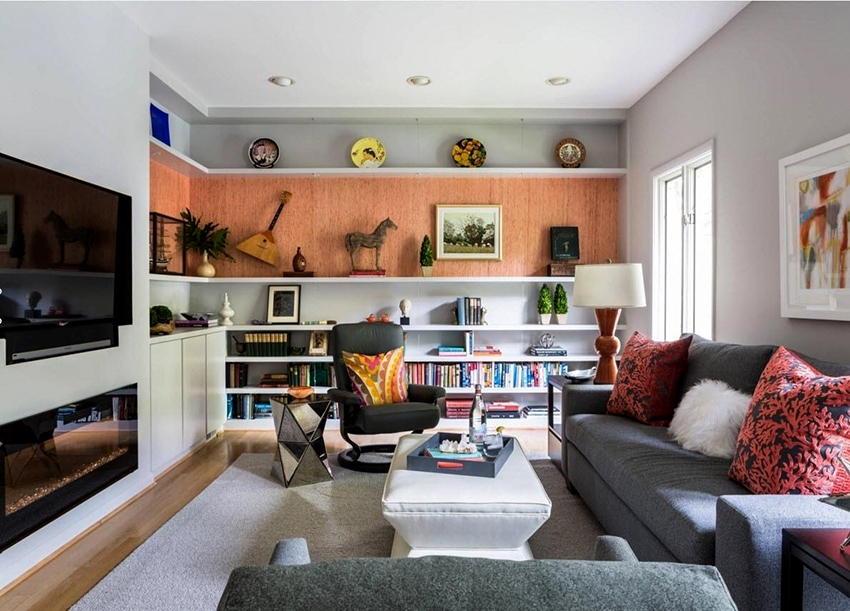
The shelf can be designed for storing books or beautiful dishes
The main difficulty that most people face when drawing up a drawing. consists in assembling individual units. For the standard design, jumpers are needed that are fixed at the corners. In this case, to organize one connection, two corners are required. One of them is mounted on the right and the other on the left.
Assembling a classic wooden shelf with your own hands
Before starting work, you need to prepare the appropriate tools, and you also need to perform wood processing. For this, as mentioned above, a special grinding machine is used. After preparing the tools and the material itself, you can start assembling the structure. Let's take a closer look at this process.
First of all, raise the bottom shelf above the level of the work surface by about 1 cm.After that, you can start screwing the parts that will be located on the side to the base. When assembling a homemade shelf on the wall, you need to control the location of the screws. They should enter the wood at right angles.
At the next stage, you need to turn the workpiece upside down and carry out the markup corresponding to the location of future cells. The number of shelves in the case is determined depending on the purpose of the structure.

Wooden shelves look great in modern interiors
Helpful information! The cells can be of the same or different dimensions. It all depends on the individual wishes of the master.
Next, you need to connect the bottom of the shelf with jumpers, which are screwed in the same position (inverted). Then you can start fixing the side faces to the top bar. To make a wooden shelf with your own hands, you must strictly follow the order given in the instructions.
During fastening of individual elements of the shelf frame, the structure may be skewed. How do you make a shelf to avoid this? Experts recommend using flat window corners when assembling the product. They are fixed at the bottom (on the back). If the design provides for the installation of the rear wall, then in this case there is no need for this action.
The finished shelf should be stained. Then you need to wait until it dries, after which you can start applying the varnish composition. In order to perform a high-quality coating, it is necessary to dilute the varnish with a solvent and apply it in 3 layers. It is important to remember that the application of each subsequent layer is performed only after the previous one has dried.

After assembly and painting, the finished structure can be installed on the work surface. To do this, use special mounts for shelves on the wall. These can be standard hinges or brackets. The shelf installation mechanism must be observed to ensure the required reliability of the product.
DIY corner wall shelf: assembly algorithm
From the name of such shelves it becomes clear that they are installed in the corners of rooms. These structures can have different heights, and they also differ in the number of levels. Before proceeding with the installation of a wooden structure, it is recommended to study the training videos, which clearly show and explain each step of the assembly.
Consider the sequence in which the standard corner shelf is installed. First of all, you need to prepare all the necessary tools and materials. In order to make a shelf with your own hands, wooden slats with parameters 20x50 mm are suitable.

Corner shelves take up minimal space, but significantly expand storage space
To complete 2 frames, you will need to choose even slats, without knots and other defects. To assemble the structure, you will need to prepare 4 products 70 cm long and 6 parts (30 cm each). It is recommended to glue the individual components of the frames. For the operation to be successful, you need to use a clamp.
Then you can start making shelves with your own hands. How to make tiers for a corner structure? For this, materials are most often used that are easy to process (plywood, chipboard, etc.).
Note! The shelves can be stacked. In this case, you will need to glue several strips together and cut out the necessary parts. From the outside, they are girded with a curly rail.
After making the shelves from wood with your own hands, they should be docked with the frame. Then, if necessary, the structure is varnished. If a material such as laminated chipboard was used as the material for the shelves, then there is no need to varnish the parts.
The final stage involves fixing the hinges and placing the structure in a corner.It is worth noting that for the corner version, it is customary to use a kit that includes two hinges.
How to make a hanging shelf: round design
Designs that are round in shape are an unusual and stylish solution for a living room or bedroom. This option is recommended to be assembled when there is no need to save usable floor space. Round shelves are quite large.

Round shelves are difficult to manufacture, but they have a very original look
In order to complete the assembly of this structure, you should choose the right source materials and correctly carry out a preliminary calculation. What to make a shelf of this type? The most suitable material for this is a fiberboard sheet. It has good strength, but at the same time is prone to deformation due to its great flexibility.
The first step in making a round shelf is cutting strips of the required length and width. First, you need to prepare a board that will serve as a shelf. Next, markings are applied to the strips. In this case, it is required to make an indent corresponding to the size of the overlap.
To form a round structure, you will need to connect the edges of the strips to each other. One of them must go to the second. Then they are fixed in one position by using a clamp and fastened with screws. You must be careful when installing such a shelf with your own hands. Photos of finished structures, as well as video materials, help you quickly understand how they are assembled.

It is rather difficult to make a round shelf at home.
Before you finally fix the structure with screws, you should make sure that it is not distorted. And also you need to check the correct location of the shelf with your own hands. In some cases, the drawing may show not only a horizontal flange, but also faces located in a vertical plane. Such parts also require verification, for which a construction square is used.
At the next stage, the product is varnished. In addition, it can be painted over. To install a round structure, a standard method is used - metal hinges.
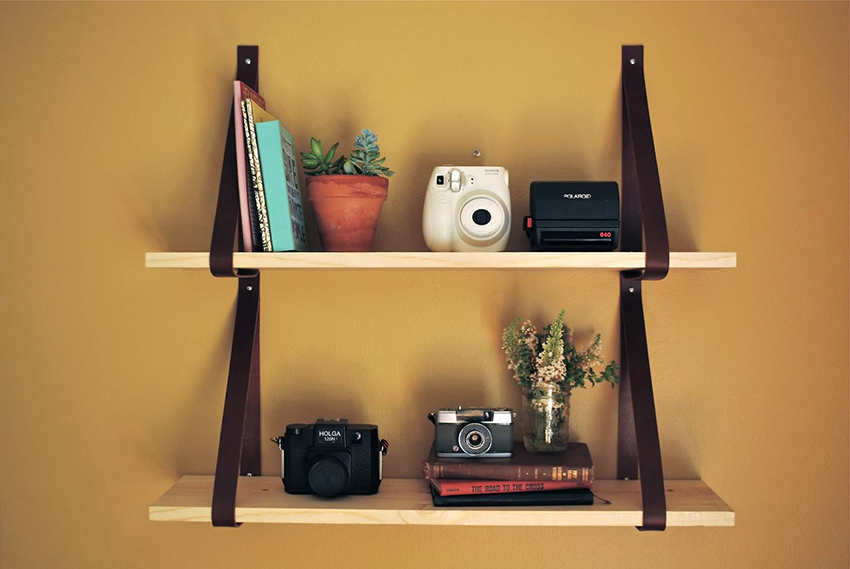
How to make a wall shelf yourself
A rather interesting type of furniture is a hanging shelf. This design is original and able to emphasize the interior, made in a modern style. Another advantage of the hanging shelf is its compactness.

Brackets for fixing shelves of different shapes and colors can be purchased separately
Helpful information! Experts recommend installing hanging shelves in apartments that require saving free space.
In order to assemble a hanging shelf, you must strictly follow the instructions. Such a product can be used to store small interior items or for books. It is not very difficult to make a shelf of this type with your own hands, which is also an advantage. Let's consider in more detail the assembly process of this structure.
First, you need to draw up a preliminary draft. It should contain information about the number of tiers, their sizes, and also take into account the distance between individual shelves. Further, a place is selected on the wall in which the suspension structure will be installed.
At the next stage, elements of the required length and width are cut from wood or some other material that is similar in their characteristics. After that, 4 holes are made in each shelf (2 from one edge and 2 from the other). It is important to remember that the holes must have the same diameter. Experts recommend preparing a template with ready-made holes of the appropriate size for such work.
The next step in making such an original shelf for books is decorating it.First, the products are processed using sandpaper or a grinder. The second option is more acceptable, since the use of electrical equipment allows you to quickly cope with the work.
Then you need to paint the parts, after which you can start installing them. When hanging the shelf, you need to take into account the weight of the objects that will be located on the structures. For example, if these are books, then it is recommended to choose a strong cable that can withstand their rather impressive weight.

Shelves covered with stain and varnish take on a presentable look
It must be cut into segments according to the project. Then the cable is threaded through the holes and fixed at different levels using special clamping clips. Holes should be made in the wall for hooks with screws to which both cables are attached.
How to make a pipe rack with your own hands
This type of structure looks great in modern designs. They can be found especially often in minimalist interiors. The use of pipes is a good solution, since a strong and reliable frame is made from them. The length of such a rack and the number of shelves included in it can be easily adjusted according to the wishes of the owners.
The first stage of the work is the preparation of wooden shelves. They must be treated with special oil. This action will give the details a smooth texture. It is acceptable to use wax for the same purpose. Further, the shelves can be varnished. After processing, you should wait until the products are dry, and proceed to the next stage of constructing a shelf from pipes.

Shelves made of wood and metal look very organic
In the corners of the parts, you need to install flanges that have a round shape. They should be approximately 2 cm from the edge of the shelves. The required areas corresponding to the connections are marked with a pencil.
Next, you need to fold all the shelves into a stack and clamp them in a clamp. Then holes should be made in the two upper parts. The holes are made in the central area of the flange. It is important to remember that subsequent planks require a larger diameter drill. This is due to the fact that pipes will pass through them. Do-it-yourself photos of wooden shelves, demonstrating the various stages of assembling the rack, allow you to understand the features of the work.
The next stage is the assembly. Each flange must be placed on the bottom shelf and secured. The fasteners are made in such a way that the product does not cover the through hole in which the pipe will be located. Then pipes should be inserted into the holes on the shelves. They must be threaded at both ends. Use a wrench to connect each pipe to the flange. At the top, it is imperative to mount a coupling.

Square metal shelves are suitable for a minimalistic interior
Often this assembly method is used for the manufacture of shelves in the pantry. How to make a similar rack with your own hands? This question can be answered by training videos that clearly demonstrate each stage of the design.
Helpful information! The pipe material can be different. However, experts recommend using galvanized parts, as they differ in the most suitable technical characteristics. They have good strength and are also resistant to moisture.
After assembling all the structural elements, it is necessary to screw the flange parts to the upper ends of the pipes. Next, you need to fix them on the upper crossbar. Quite often, this design is equipped with legs with wheels, which allows you to make the rack mobile.
DIY wall shelf for books: preparing tools and materials
The interior of the room consists of various zones and pieces of furniture.Shelves are a very important design element that makes the room look more habitable and cozy. They can be done independently, since products of this type are not complicated. To carry out the assembly correctly, you need to read the recommendations of specialists and step-by-step instructions.

Drawers can also be used as wall shelves
For self-production, it is best to choose a simple design that takes into account the use of wooden slats. How to make a bookshelf?
To get started, you need to purchase the following tools:
- screwdriver;
- electric drill;
- a hacksaw for wood (with small teeth);
- measuring tape;
- level.
The preparation of the necessary tools is an important stage that affects the convenience of work and the speed of assembly of the structure. Instead of a hacksaw for wood, you can use an electric jigsaw. This tool can significantly reduce shelf production time.
From the materials you will need to prepare:
- slats - 20x40 cm;
- self-tapping screws.
For assembling book shelves, as a rule, self-tapping screws are used, the length of which is 45 mm. The calculation of their number is quite simple. 2 self-tapping screws are used for one fixation point. Therefore, to calculate the final figure, it is necessary to multiply the number of fastening zones by 2. At the end of the preparatory stage, you can start assembling the bookshelf.

Old suitcases make a wonderful shelf for books
DIY bookshelf assembly: procedure
The dimensions of the future shelf are calculated individually, depending on the wishes of the owners and the dimensions of the room. It should be noted right away that in most cases, a width of 20 cm is sufficient.When assembling the shelf, you must be careful to avoid mistakes.
How to make a shelf with your own hands? The initial stage of self-production of this design involves the assembly of ladders. This is the name of the side parts, which are the skeleton of the structure. The first step is to make racks. Further, transverse elements are fixed to them, which are used to give rigidity.
Note! In order to secure the cross members, it is necessary to pre-drill the corresponding holes in the racks.
First, the cross member is fixed with one self-tapping screw. After that, you should check the correctness of its location, as it may deviate. Next, the second fastener is screwed in.

A simple wall shelf can be made in a few hours
The next step in assembling a shelf for books is connecting the ladders to each other. Before that, you need to check the correctness of the angle. For this, a construction square is used. The ladders are connected by means of rails. Their length should correspond to the design indicator defined earlier. Then the remaining rails are fixed.
After the frame is made, it is necessary to check how smoothly the structure is assembled. If the work is done correctly, then you can start fixing the book shelf to the wall. Photos of finished products of this type allow you to evaluate their advantages. After fixing to the wall, the structure is supplemented with shelves.
Thus, making your own bookshelf is not difficult. All the work can be done in a few hours. In addition to this method, there are other, more original options for assembling a shelf for storing books.
Hinged shelf for books from the drawer: non-standard option
A wall shelf can be made from unnecessary interior items. One of the options allows for the use of an old chest of drawers. A shelf of this type is made using dividers separating the sections from each other. This will require the following tools and materials:
- box;

Board clippings can be applied to book shelf designs
- plywood;
- glue;
- liquid Nails;
- loops;
- sandpaper;
- paint or varnish;
- brush;
- dowel-nails;
- puncher;
- drill 8 mm (for concrete);
- screwdriver;
- self-tapping screws;
- wallpaper.
Wallpaper is used to decorate the back of the drawer. The shelf assembly process consists of several steps that are worth studying before starting work. The first thing to do to assemble such an unusual shelf for books is to cut out the demarcation elements from the plywood. For this work, you need to purchase a jigsaw.
Helpful information! If you wish, you can use a hacksaw with fine teeth, but this will significantly increase the operating time.

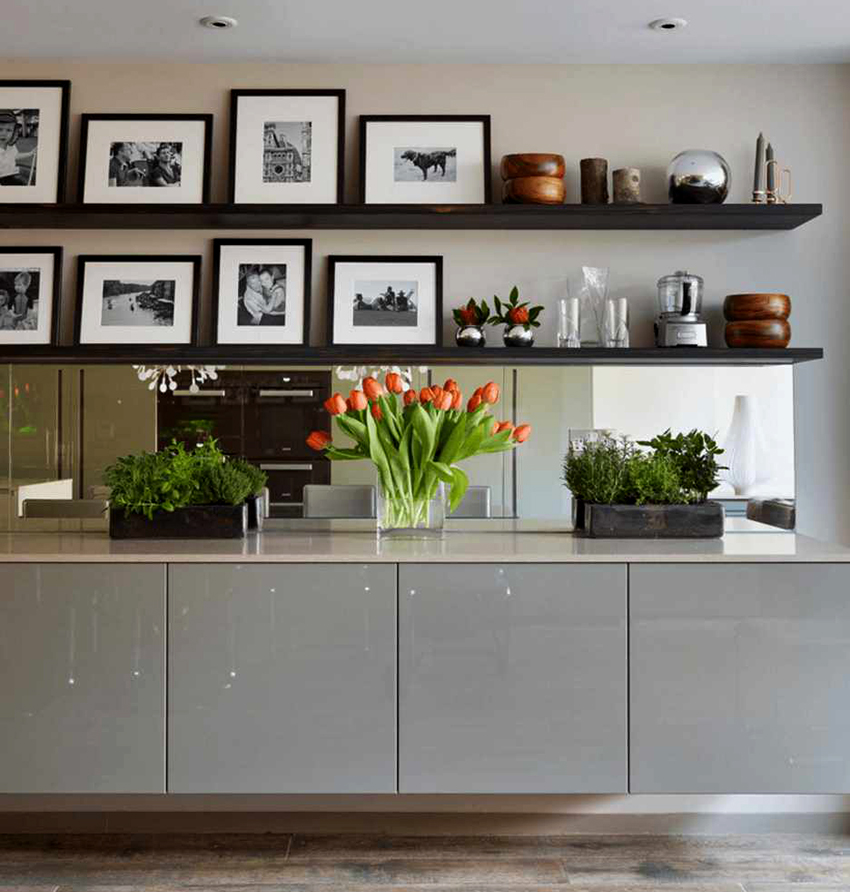
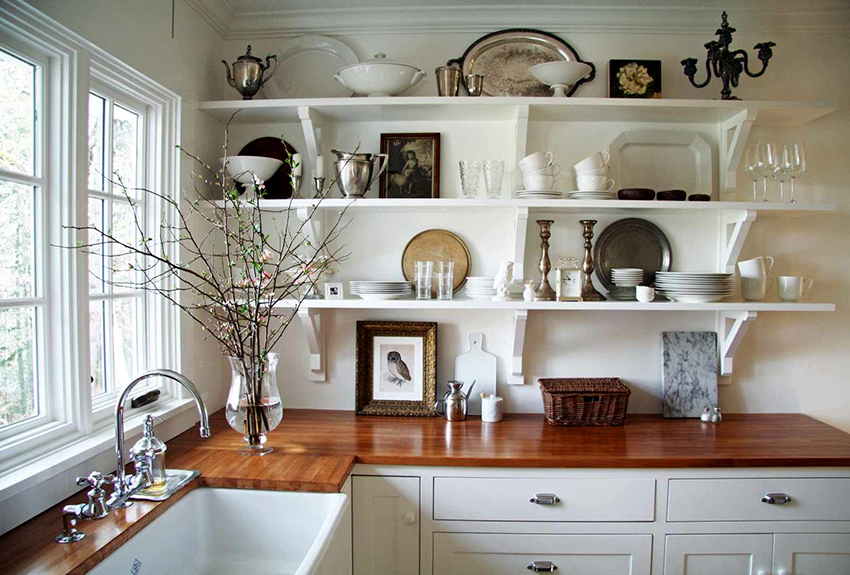
Shelves in the kitchen the entire length of the working surface can replace the upper tier of cabinets
The next step is to process plywood parts. They need to be sanded and varnished. Grinding is done using sandpaper. Then the parts are varnished (at least 2 layers). The next step in assembling a wall shelf for books from a drawer takes into account decorating the back wall with wallpaper. It is necessary to cut from the canvas a part corresponding to the dimensions of the rear wall, and then glue it.
Wooden spacers are installed with liquid nails. Next, you need to varnish the outer surface of the box. This is necessary to protect it from moisture and other adverse factors. In order to answer the question of how to make a shelf for books in this way, it is recommended to watch the corresponding video materials.
At the last stage, the fasteners are mounted on the wall and the box is installed on them. Loops must be nailed on its back. In the absence of nails, you can use self-tapping screws. Holes are made in the wall with a drill, after which dowel-nails should be installed in them. The shelf is hung on them, and the work ends there.
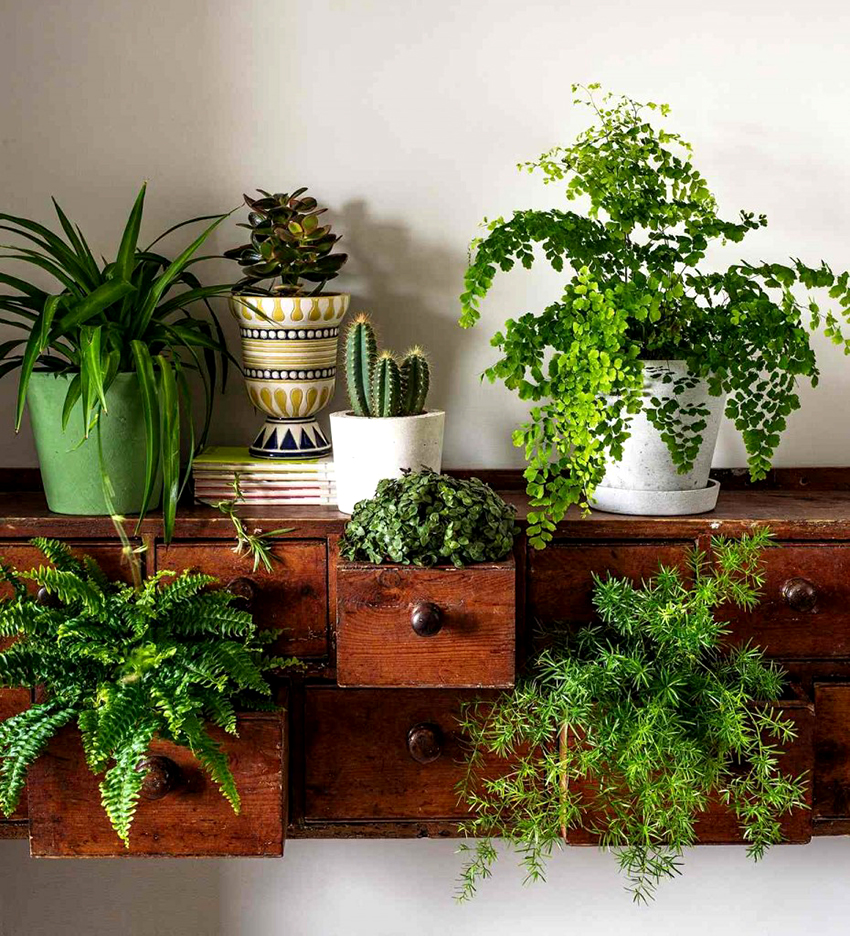
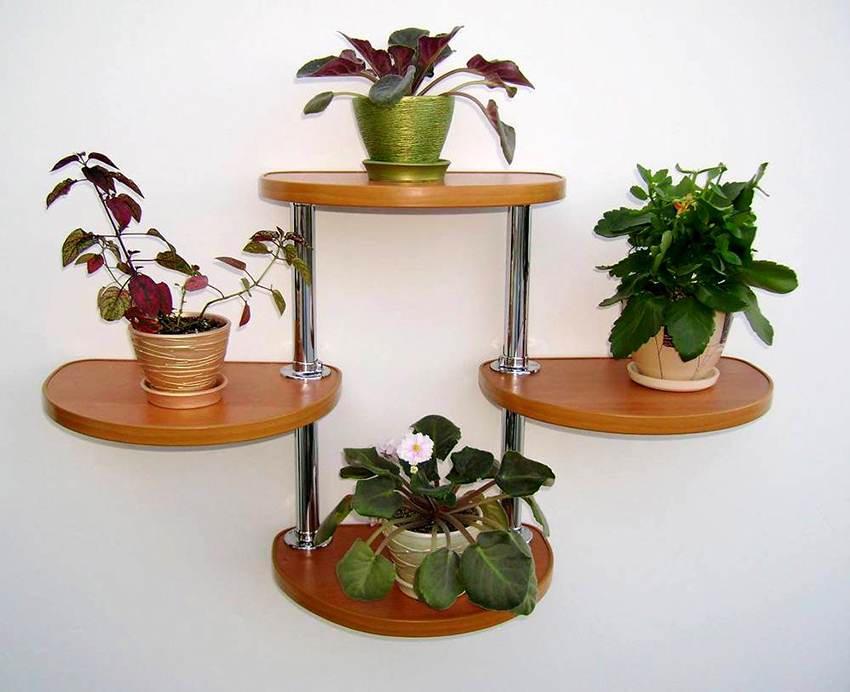
Making a wooden shelf for flowers with your own hands
Flowers can liven up any interior. There are many different designs on which to place your plant pots. To save money, you can do one of them yourself. Before you start making a flower shelf, you need to calculate its dimensions and make a plan.

Flower shelves can be mounted even in the most unusual places
At the initial stage of designing such a shelf, it is necessary to prepare a board 120 mm wide and 25 mm thick. To assemble a shelf for flowers with your own hands from wood, you need to choose a board 130 cm long.It needs to be sanded with a grinder or sandpaper.
After that, one of the edges should be cut so that an angle of 90 ° is obtained. Further, on the details, it is necessary to make a markup at right angles with a step of 20 cm. Then the board is divided into equivalent segments. When cutting a part, the hacksaw should be at an angle. This will allow for a straight cut.
As a result, you should get 6 equivalent wooden elements measuring 20 cm. Before assembly, each segment should be sanded with sandpaper. Further, holes are made along the edges of the products. For this purpose, you need to prepare a drill and drill.

The option of mounting the shelf on the studs will avoid the use of bulky brackets
Note! All these stages are a kind of preparation, which is necessary in order to make a shelf for flowers without mistakes. As a rule, any person who does not have special knowledge and skills can handle such work.
The next step involves direct assembly of the structure. The whole process consists in fixing the wooden segments together with self-tapping screws.
Then the fasteners are fixed to the structure. Holes for dowels are made in the wall. At the final stage, the finished product is hung on the hinges.Photos of flower shelves allow you to choose the required type of construction, which is suitable for the interior of a particular room.
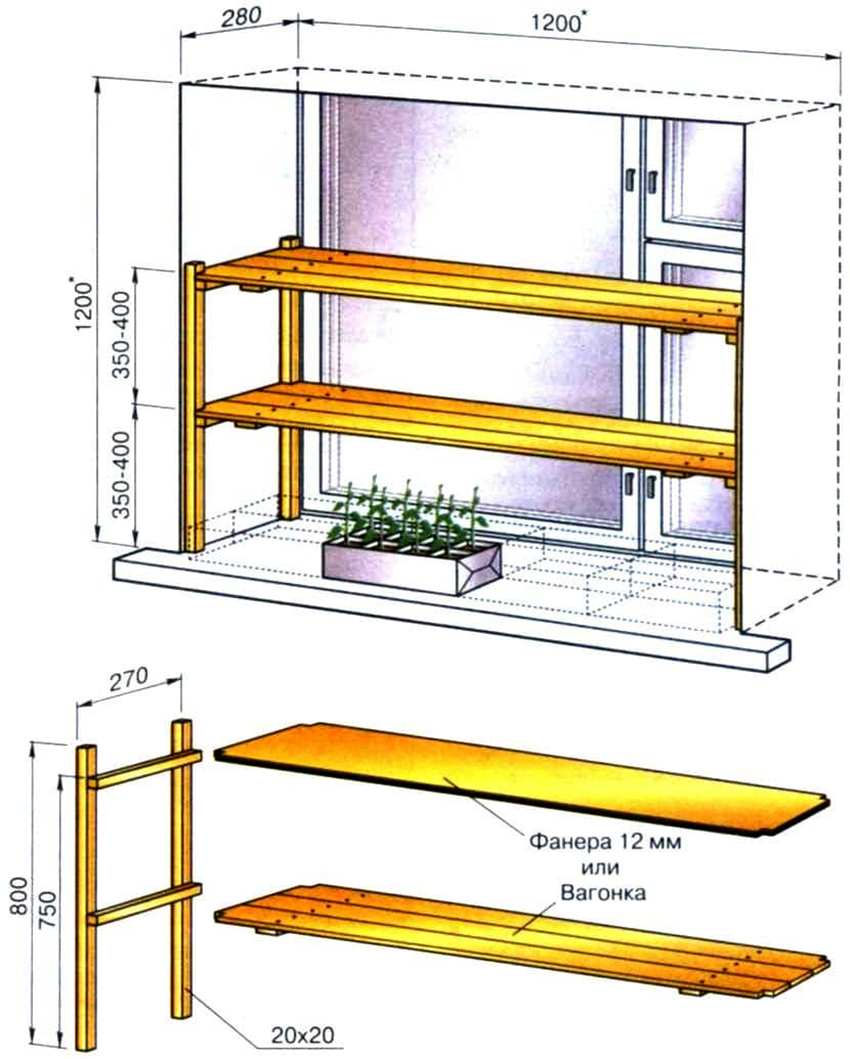
This product is small in size, so it can be used for plants that do not take up much space. If the work has been done correctly, the shelf will hold the flower in the pot.
DIY plywood wall TV shelf
In rooms that are small in size, it is often difficult to allocate space for a TV. An example is the kitchen. Usually, the usable area of this room is exploited to the maximum. Where to install the TV in this case? The equipment can be placed in the corner on the shelf. Let's consider how to assemble a TV shelf.

An unedged board TV shelf can perfectly fit into the design of the room
It should be noted that modern devices are most often hung on the wall using brackets. Therefore, a shelf in this case usually means a structure on which a DVD player is located. However, sometimes it becomes necessary to install basic equipment on a shelf. In this case, there is a simple option that allows you to independently assemble such a structure.
At the initial stage of assembling a wall-mounted TV shelf, you will need to prepare the necessary tools and materials. The product is best made of plywood, which is easy to process. The best option for installing your TV is a corner shelf. The edges of the part must be sanded, after which it is pasted over with a special self-adhesive film. The drawing in this case is selected depending on the interior of the kitchen.
Next, you need to fix the fasteners on the part, with the help of which it will be docked with the working surface. For fixing, self-tapping screws are used, the dimensions of which are selected according to the width of the plywood itself. The best location for the mounting hardware is the bottom of the TV shelf.
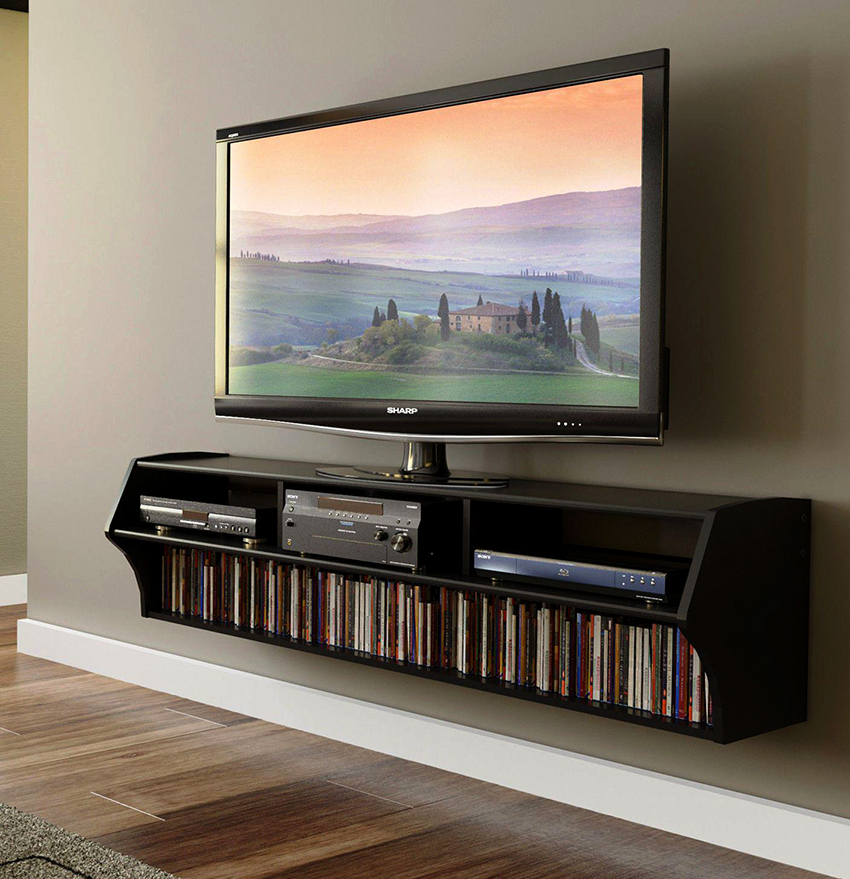
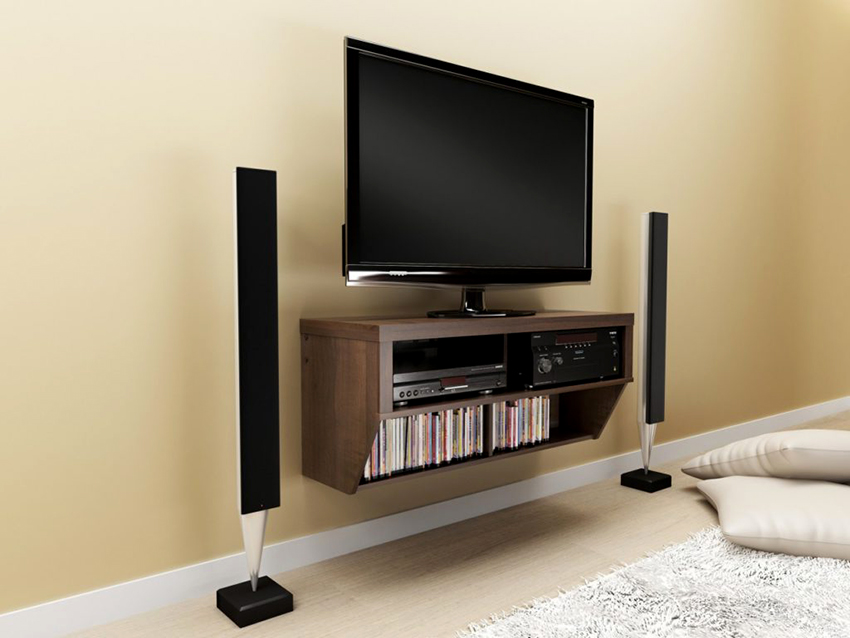
At the next stage, the shelf is applied to the wall, on which it is necessary to mark the places where the holes will be located. With the help of an electric drill and a drill with the required diameter, holes are made on the working surface. Then it is required to insert dowels equipped with nails into the resulting grooves. This completes the work, now you can start fixing the shelf on the wall. For a TV, this design is suitable if the dimensions of the device are not very large. The corner version saves the useful area of the kitchen.
Helpful information! After installing the shelf, check that it is level. For this, a building level is used. The locations corresponding to the placement of the fasteners also need to be checked.
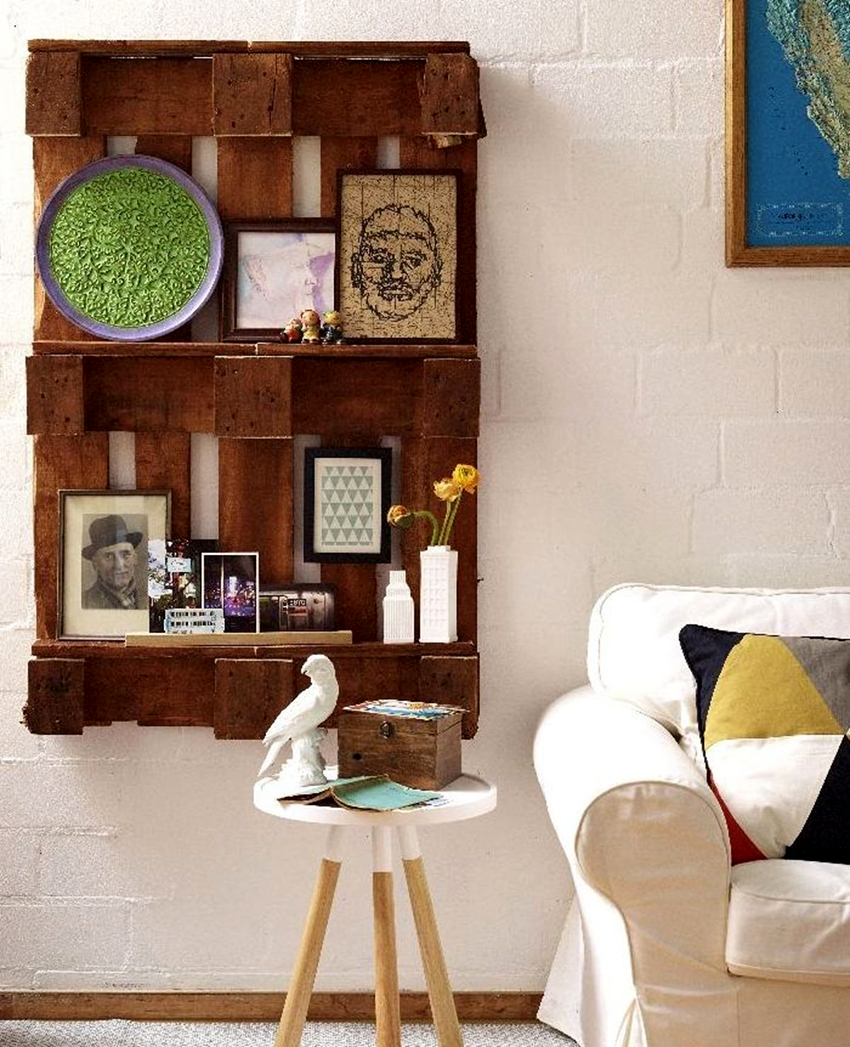
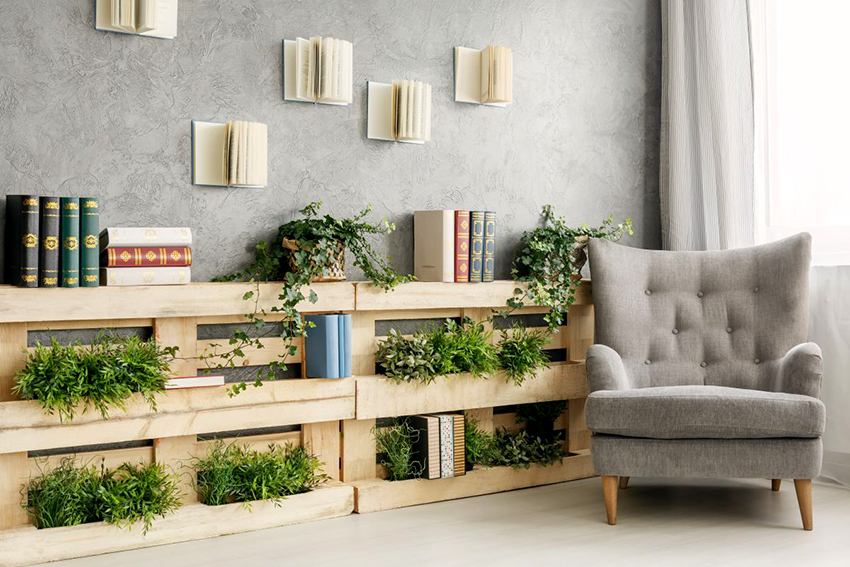
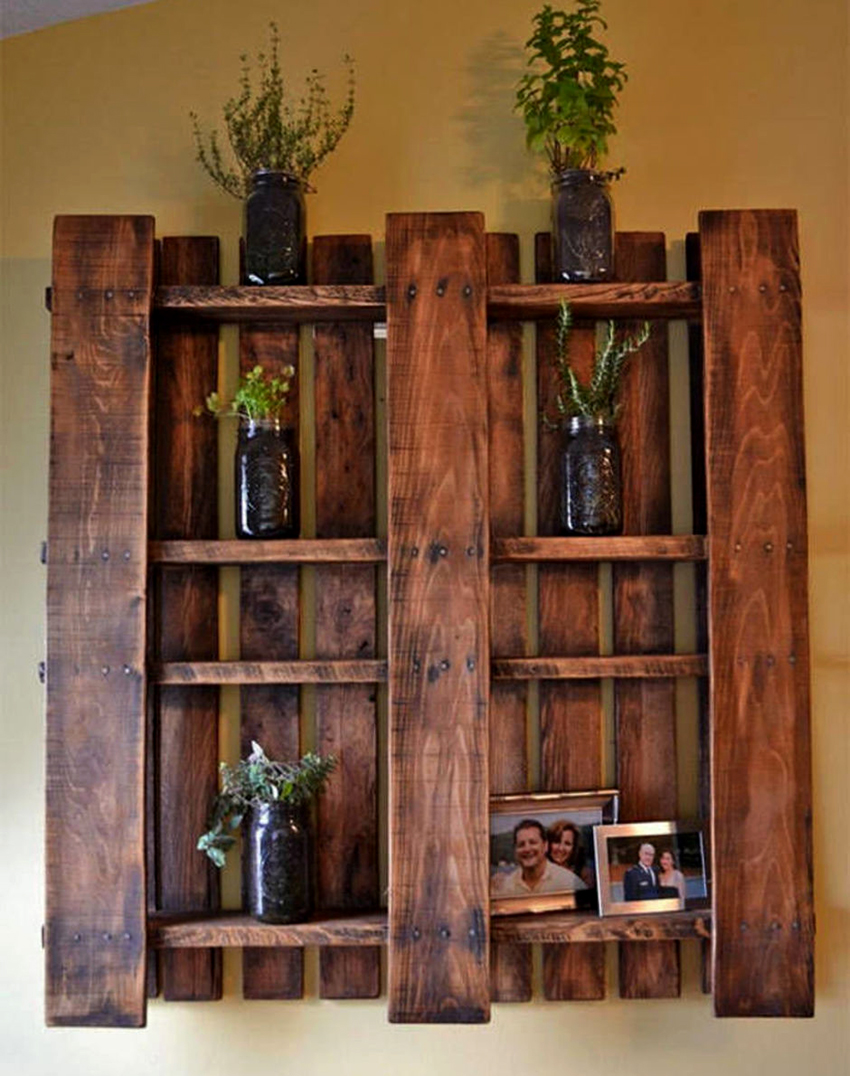
Custom solution: construction pallet shelf
The shelf can be made not only from traditional materials. Of course, the most popular option is to make a structure from plywood or to assemble a chipboard shelf with your own hands. However, there are other options that allow you to assemble this element of the interior.

In modern pallet design, a very popular product is almost finished shelves.
In modern design, there is a very popular material - building pallets. They are used to construct not only shelves, but also other, more complex furniture elements (for example, sofas). Pallets can be purchased very cheaply or found at a nearby construction site.
The use of pallets is justified if the landlord wants to create an industrial decor in it. To assemble one such original shelf on the wall, you will need to prepare two wooden pallets. The first thing to do is make a plan. Then you need to disassemble the pallets. The result will be the following set of parts:
- 8 boards - 100x22 mm (length 120 cm);
- 8 boards - 145x22 mm (length 120 cm);
- 12 beams - 14x100 mm;
- 6 beams - 145x145 mm.
Almost any wooden structure can be assembled from individual pallet elements. Using this material, it is easy to easily make wall shelves for flowers or shelves for shoes.

After disassembling the pallets, it is necessary to prepare a set of parts from their individual constituents, intended for the manufacture of a multi-tiered shelf. You will need 4 boards with dimensions of 640x145 mm, as well as 2 boards each with the following dimensions: 680x145, 840x145 and 290x145mm. In addition, it is necessary to prepare two parts 640x100 and 840x100 mm, two products 290x50 mm and two wooden blocks 145x100 mm.
Before you start creating a shelf, you should process each part. For this, either a special electric grinder or sandpaper is used.
DIY assembly of shelves from pallets: stages
It is very important to follow the required order of construction of the pallet shelf. The step-by-step instructions exclude any deviations from the regulations. First of all, the foundation of the future structure should be completed. To do this, you need to prepare two boards 640x100 mm in size and fix the checkers along their edges.
Then you need to fix wide boards (290x145 mm) on the checkers. Fixation is performed in such a way that the parts are located strictly perpendicular to the narrow structural elements. The multi-tiered pallet structure can be used as a book shelf. How to make a case with your own hands? In order to complete the box, it is necessary to fix its remaining elements.

Wall-mounted pallet shelves look very original
You will need to screw two boards to the side of the base. For this, special wood screws are used. The dimensions of one part are 840x100, and the second is 840x145 mm. At the end of the work, you should fix the side boards on the opposite side of the base of the future shelf.
Note! After fixing the next part, it is recommended to check the accuracy of the location of individual elements in the structure, since their shifts are possible.
Next, the crossbar is installed. For this, two boards are used that have equal dimensions (680x145 mm). Photos of this type of bookshelves can be viewed on the Internet. This will allow you to determine the appropriateness of such a design for a particular interior.
At the next stage, you need to fix two boards on the main part, the dimensions of which are 640x145 mm. In order to complete the remaining shelves, strips are used, the function of which is to create a support. The dimensions of such strips are 290x50 mm.

Pallet shelves are available in many options
The final stage of assembling a multi-tiered shelf of this type takes into account the fixation of the remaining elements with dimensions of 640x145 mm. Experts recommend to additionally secure such elements from the ends. For this, wood screws are also used.
How to make a shoe rack with your own hands from a pallet
Many different shelves and other furniture can be made of pallets. All it takes is tools and desire. Often, a structure is made from pallets, which is installed in the hallway and is used to store shoes. Moreover, the installation of such a shelf can be performed without the use of electrical construction equipment. Let's take a closer look at the whole process from start to finish.
The first thing to do when making such a structure is to sand the pallet. To save time and effort, experts recommend polishing only the part that will be visible. After grinding the front side of the future shelf in the hallway, it is necessary to remove dust from it.

The pallet can also be used for manufacturing shelves for shoes
At the next stage of design, you will need to apply a special primer for wood to the surface of the pallet. This will protect the material from the harmful effects of mold.
Then you need to cover the surface of the pallets with a coloring compound or varnish. Thus, the shelf is processed in the hallway. The easiest way to do this element of the interior with your own hands. After the paint has dried, place the pallet against the wall. If desired, such a structure can be additionally decorated by drawing a drawing on it.
Features of the decor of wall structures: how to decorate the shelf
In most cases, the work of assembling a shelf takes into account another important point - its decoration. The decoration of the structure allows you to give it a complete appearance and more organically fit this piece of furniture into the interior of the room. There are several rules that allow you to decorate the shelf correctly.

Shelf mounting brackets can be replaced with metal strips
You should immediately pay attention to the color combination, which obeys the rule of three colors. The main tone is the one in which the structure is painted. Items located on it must be made in two other colors.
Helpful information! Experts recommend choosing auxiliary colors so that they contrast with the main one. This will highlight the items on the shelf.
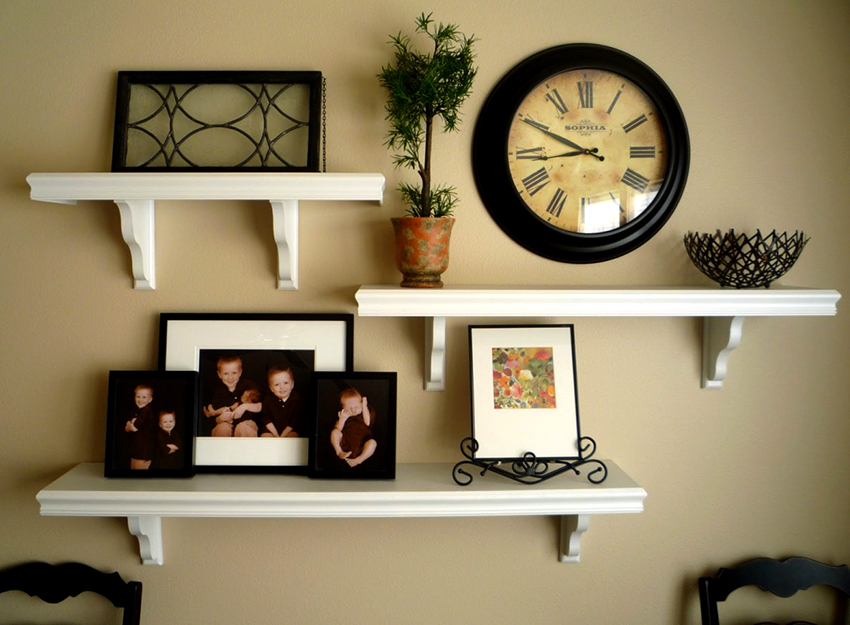


Another trick involves a triangular arrangement of items on a hinged shelf. It is quite simple to arrange the structure with your own hands in this way. Similarly colored items are arranged on the shelf in such a way as to form an imaginary triangle.
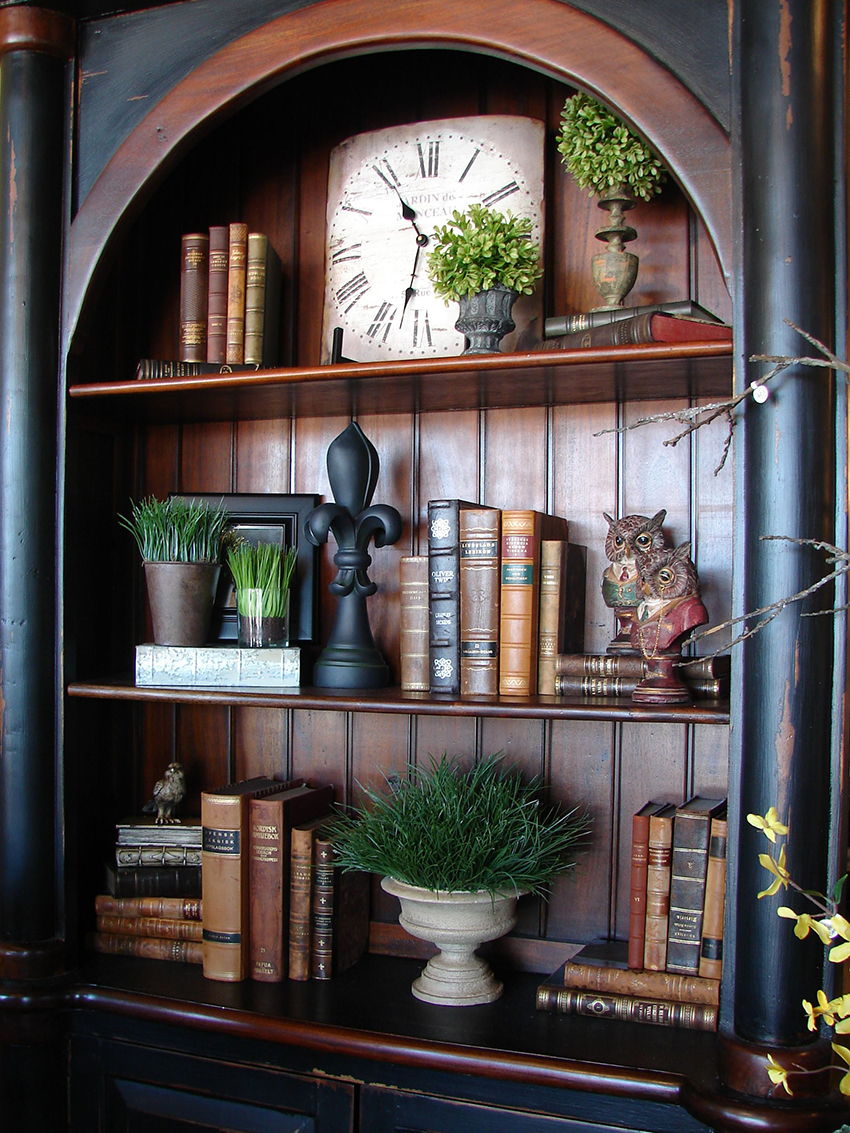
If the product is located high, then it is recommended to place small objects on it. Accordingly, it is best to put more voluminous things on the lower tiers. It is desirable to decorate original bookshelves with flowers (natural or artificial). The pots can be placed on the top tier.

Wide wall shelf can act as a table
When placing items on the shelf, it is necessary to consider which of them will be used most often. For example, the items you need need to be stored on tiers that are within easy reach.
Home shelves can be made by yourself. Their design features depend primarily on the purpose. With your own hands, you can make products for the living room, bedroom, kitchen, bathroom, as well as the hallway. During assembly, it is recommended to follow the instructions and not deviate from them.